Over the years, dry back vinyl flooring has become a popular choice for homeowners seeking durability and style. In this crucial guide, you will learn everything you need to know about installing and maintaining your dry back vinyl floors to ensure they last for years to come. From preparation and installation steps to cleaning and care tips, this comprehensive resource will empower you to make informed decisions and keep your floors looking their best. Let’s look into the details and give your space the beautiful flooring it deserves.
Types of Dry Back Vinyl Flooring
The world of dry back vinyl flooring offers various options tailored to your needs. Here’s a breakdown of the key types:
- Glue-down Vinyl
- Loose Lay Vinyl
- Sheet Vinyl
- Plank Vinyl
- Luxury Vinyl Tiles (LVT)
Knowing the differences between these types can greatly assist you in making the right choice for your space.
| Type | Description |
| Glue-down Vinyl | Adhered securely with adhesive, providing stability and a seamless look. |
| Loose Lay Vinyl | Installed without adhesives, allowing for easy replacement and installation. |
| Sheet Vinyl | Comes in large sheets, ideal for minimizing seams. |
| Plank Vinyl | Designed to resemble hardwood planks, perfect for a natural look. |
| Luxury Vinyl Tiles (LVT) | High-end option with realistic designs, great for high-traffic areas. |
Glue-down Vinyl
Little maintenance is needed for glue-down vinyl, as it is securely fastened to the subfloor with adhesive. This type provides a solid feel underfoot and is often favored for high-traffic areas due to its durability and resistance to movement. You will appreciate how it contributes to a sleek and seamless appearance in your interiors.
Loose Lay Vinyl
Assuming you are looking for a flexible flooring solution, loose lay vinyl could be your ideal choice. This type is easy to install and remove, requiring no adhesive, making it perfect for temporary or changing environments. You can easily reposition or replace sections without the commitment of glue, which is an added bonus for renters or those who enjoy frequently updating their decor.
Vinyl flooring in a loose lay format interlocks at the edges, providing stability while allowing for slight movement beneath your feet. It’s particularly beneficial in residential settings where comfort and ease of installation are priorities. You can even lay it over most existing floors, which saves you time and effort during renovations. This versatile option not only enhances visual appeal but also supports your lifestyle needs.
Pros and Cons of Dry Back Vinyl Flooring
Clearly, understanding the pros and cons of dry back vinyl flooring is vital for making an informed decision. This type of flooring has distinct advantages and disadvantages that can influence your choice based on your specific needs. Below is a summary of these aspects:
| Pros | Cons |
|---|---|
| Durable and long-lasting | Challenging installation process |
| Water-resistant | Requires a flat subfloor |
| Variety of styles available | Potential for peeling over time |
| Easy maintenance | More rigid than other types of vinyl |
| Cost-effective | Limited flexibility |
Advantages
Advantages of dry back vinyl flooring include its durability, making it suitable for high-traffic areas. It is water-resistant, allowing for easy cleanup and maintenance. With a wide range of styles and finishes, you can create the aesthetic you desire without breaking the bank. Additionally, its cost-effectiveness compared to hardwood or tile options makes it an appealing choice for many homeowners.
Disadvantages
Now, it’s important to consider the disadvantages of dry back vinyl flooring, as they can impact your experience. The installation process can be labor-intensive and may require professional assistance due to the need for a perfectly flat subfloor. Furthermore, while it’s generally durable, it can peel over time if not installed correctly, and it lacks the flexibility that some other flooring options provide.
Another important aspect of the disadvantages is that the rigidity of dry back vinyl flooring can make it uncomfortable to stand on for extended periods. This can be a significant consideration if you spend a lot of time in areas like the kitchen or laundry room. Additionally, the requirement for a smooth subfloor might mean extra preparation work, which can add to your overall installation time and costs.

Factors to Consider Before Installation
Despite the advantages of dry back vinyl flooring, several factors warrant your attention before installation. Consider the following:
- Your specific climate conditions
- Moisture levels in your home
- Subfloor preparation and materials
- Expected foot traffic in the area
- Light exposure and its effect on flooring
Perceiving these factors will help ensure a successful flooring installation.
Subfloor Type
If your subfloor is concrete, plywood, or another material, it’s imperative to assess its condition prior to installation. Leveling and moisture control measures might be necessary to create a suitable base for your dry back vinyl flooring.
Room Usage
Room usage plays a significant role in determining the right type of dry back vinyl flooring for your space. You must assess whether the area experiences high foot traffic, moisture, or specific activities that may affect the flooring’s durability.
A kitchen or bathroom, for example, may require more durable and water-resistant vinyl than a bedroom or office. By evaluating the demands of each room, you can make informed decisions about the thickness, wear layer, and overall quality of the vinyl flooring, ensuring it meets your needs while providing longevity and comfort.
Step-by-Step Installation Guide
Not all installation processes are the same, which is why it’s vital to follow this step-by-step guide. Below, you will find a breakdown of each important stage in the installation of dry back vinyl flooring.
| Phase | Description |
|---|---|
| Preparation | Gather tools and materials, and measure the area. |
| Installation Process | Adhere vinyl sheets to the subfloor as per guidelines. |
| Finishing Touches | Seal edges and add trim for a polished look. |
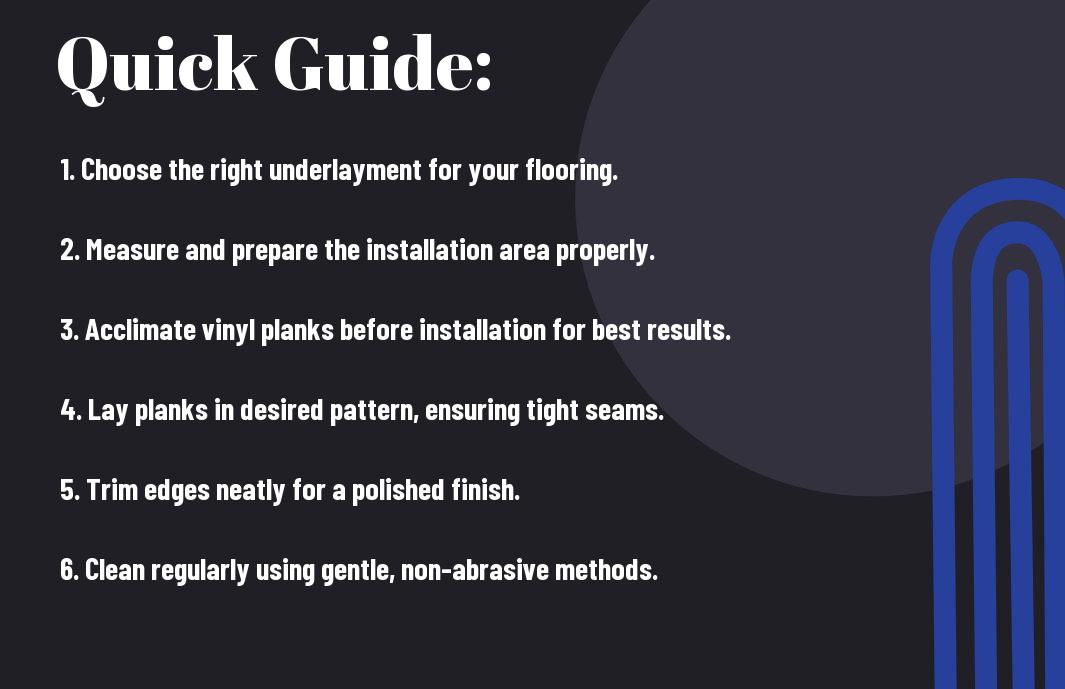
Preparation
To start off your installation, you’ll need to gather the necessary tools and materials. Measure the space accurately and ensure that your subfloor is clean, dry, and free of debris, as this will help achieve a flawless finish. Additionally, allow your vinyl planks to acclimate to the room temperature for 24-48 hours before installation.
Installation Process
On the day of installation, start by laying down the adhesive according to the product guidelines. Next, position the vinyl sheets carefully, ensuring proper alignment. Use a roller to press down each section, making sure there are no air bubbles trapped underneath.
Understanding the installation process for dry back vinyl flooring is vital to achieving a long-lasting and appealing result. Make sure to follow the adhesive manufacturer’s instructions closely, as different products may have varying application methods and drying times. Once the vinyl is laid, it’s important to give it adequate time to set before walking on it, ensuring a solid bond between the flooring and the subfloor.
Care and Maintenance Tips
For optimal longevity and appearance of your dry back vinyl flooring, follow these imperative care and maintenance tips:
- Regularly sweep or vacuum to remove dirt and debris.
- Use a damp mop with a mild, pH-neutral cleaner for deeper cleaning.
- Avoid harsh chemicals or abrasive tools that can damage the surface.
- Place furniture pads under heavy items to prevent indentations.
- Keep your flooring free from excessive moisture.
Assume that following these tips will help maintain the beauty and durability of your flooring for years to come.
Cleaning
Some routine cleaning can significantly enhance the lifespan and aesthetic of your flooring. Make it a habit to sweep or vacuum your floors on a weekly basis to eliminate dirt, dust, and crumbs. For deeper cleaning, use a damp mop with a mild cleaner specifically designed for vinyl flooring, and be sure to rinse with clean water to ensure no residue remains.
Long-term Care
Clearly, maintaining dry back vinyl flooring requires a proactive approach to care. To safeguard your investment, you should consistently keep an eye on temperature and humidity levels, as extreme conditions can affect the material over time. If any scratches or scuffs develop, use a vinyl repair kit to address them promptly. It’s also a good idea to periodically check the seams for lifting or wear, allowing you to tackle issues before they escalate.
Cleaning and caring for your dry back vinyl flooring is an ongoing process, but the effort pays off. Ensuring that dirt, dust, and moisture are kept at bay will help your floors look great over the years. Regular inspections for damage, combined with swift repairs, extend the life of your flooring and maintain its attractive appearance. Whether it’s cleaning spills immediately or reapplying protective finishes as needed, your attention to detail will ultimately reward you with beautiful floors that stand the test of time.
Common Installation Mistakes to Avoid
Many homeowners overlook simple yet significant installation mistakes when laying dry back vinyl flooring. By being aware of these errors, you can ensure a smoother installation process and achieve a more durable and visually appealing finish in your space. Proper preparation and attention to detail are key components to a successful vinyl flooring project.
Misalignment
You should ensure that your vinyl planks or tiles are aligned properly during installation. Misalignment can lead to visible seams and an unprofessional appearance, affecting both the aesthetics and longevity of your flooring. Check your guidelines and take your time to adjust as necessary to secure a polished look.
Inadequate Subfloor Prep
Mistakes made during subfloor preparation can compromise the integrity of your vinyl flooring. If the subfloor is not clean, dry, and level, you may face issues such as warping, buckling, or an uneven surface.
Subfloor preparation is imperative for a successful installation of your dry back vinyl flooring. Before laying down the vinyl, ensure that your subfloor is free of moisture, dust, and debris. Uneven surfaces should be smoothed out, and any significant imperfections filled. Taking the time to properly prepare the subfloor will lead to a more stable and durable floor, minimizing potential problems in the future.
To wrap up
Hence, understanding the installation and care of dry back vinyl flooring is imperative for you to achieve a long-lasting and aesthetically pleasing result. By following the proper installation techniques and maintaining your flooring with the recommended care practices, you ensure that your investment not only enhances the beauty of your space but also stands the test of time. With this guide, you are now equipped to make informed decisions that will contribute to the success of your flooring project.