Most homeowners and contractors underestimate the precision required for a flawless SPC vinyl flooring installation, often overlooking key tools or preparation steps that make the difference between a professional finish and a costly redo. You’ll need more than just planks and adhesive to get it right. This guide walks you through every phase, from assessing subfloors to final cleanup, ensuring your installation stands up to daily wear and tear. A mid-sized SaaS firm recently reduced office renovation time by switching to SPC vinyl, thanks to its rigid core and click-lock system that speeds up installation without sacrificing durability.
Understanding SPC Vinyl Flooring: Types and Composition
SPC flooring combines limestone, polyvinyl chloride, and stabilizers into a rigid core that resists indentation and moisture. Available in plank and tile formats, it mimics wood or stone with high-definition printing and textured surfaces. Most products feature an attached wear layer and cork or foam backing for comfort underfoot. Perceiving the material makeup helps you select the right style for your space.
| Core Material | Limestone composite with PVC |
| Wear Layer | Clear urethane-coated PVC, 6-20 mil thickness |
| Backer Type | Pre-attached cork, foam, or vinyl |
| Installation Method | Click-lock, floating floor system |
| Common Thickness | 4 mm to 8 mm |
Comparing Rigid Core SPC to Traditional LVP and WPC
A mid-sized SaaS firm upgrading its office space might choose SPC over WPC for its superior dent resistance in high-traffic zones. Unlike traditional LVP, SPC maintains dimensional stability under temperature shifts and does not expand or contract like WPC in humid environments.
| Feature | Comparison |
| Core Density | SPC is denser than WPC and LVP |
| Water Resistance | All three are waterproof; SPC offers longest submersion tolerance |
| Subfloor Tolerance | SPC requires flatter subfloors than WPC |
| Underfoot Feel | WPC is softer; SPC feels harder unless paired with cushioned underlayment |
Pros and Cons of SPC Flooring for Modern Homes
Homeowners selecting SPC flooring gain durability and low maintenance but may sacrifice some acoustic comfort. Installation ease makes it popular for DIY projects, though improper handling can lead to edge chipping during click-lock assembly.
| Advantage | Detail | ||||||||||||||||
| Waterproof | Resists spills, humidity, and basement moisture without warping | ||||||||||||||||
| Dent Resistant | Withstands heavy furniture and rolling office chairs better than WPC | ||||||||||||||||
| Stable Core | Minimal expansion in sunlit rooms or seasonal temperature swings | ||||||||||||||||
| Easy Maintenance | Sweeps and damp mops suffice; no waxing or sealing required | ||||||||||||||||
| DIY-Friendly | Click-together planks reduce need for adhesive or professional labor | ||||||||||||||||
| Cost-Effective | Lower price per square foot than hardwood or tile | ||||||||||||||||
| Disadvantage | Detail | ||||||||||||||||
| Hard Surface | Can feel cold and transmit sound without proper underlayment | ||||||||||||||||
| Subfloor Sensitivity | Uneven substrates cause creaking or locking issues | ||||||||||||||||
| Step | Action |
| 1 | Acclimate planks for 48 hours in the installation room |
| 2 | Inspect and prepare the subfloor for flatness and dryness |
| 3 | Roll out underlayment, overlapping seams by 6 inches |
| 4 | Begin first row along the longest wall, leaving a 1/8-inch expansion gap |
| 5 | Click planks together at a 20-degree angle, locking with a tap of the mallet |
| 6 | Stagger end joints by at least 6 inches from adjacent rows |
| 7 | Use a pull bar for tight fits near walls |
| 8 | Install baseboards or quarter-round to conceal expansion gaps |
Laying the Underlayment and Establishing the First Row
Roll out the underlayment perpendicular to the floor planks, securing seams with tape to prevent shifting. Start the first row with a full plank, placing it with the tongue side facing the wall and maintaining a consistent gap using spacers.
Engaging the Click-Lock Mechanism and Staggering Joints
Angle the tongue of a new plank into the groove of the previous one at approximately 20 degrees, then lower and press down until it clicks securely. Always stagger end joints by a minimum of 6 inches to avoid weak seams and visible patterns.
When connecting planks, ensure the edges align flush before applying pressure; misalignment can cause edge lifting over time. A rubber mallet and tapping block help seat the joints fully without damaging the surface. For rooms wider than 12 feet, consider using a pull bar from the start to maintain tension across the width. A mid-sized SaaS firm renovated its office using this method and reported no joint separation after 18 months of heavy foot traffic.
Expert Tips for Installation Success
Proper preparation and attention to detail separate a good installation from a lasting one. Acclimate your SPC planks for at least 48 hours in the room where they’ll be installed to prevent post-installation expansion or warping. Always inspect each plank for defects before locking it into place. Use a chalk line to maintain alignment across long runs. Recognizing subtle inconsistencies early avoids costly corrections later.
- Allow planks to acclimate in the installation room for 48 hours
- Inspect each plank for warping, chipping, or color variation
- Use a chalk line to guide straight installations
- Stagger end joints by at least 6 inches for a natural look
- Work from the longest wall to minimize cuts
Managing Expansion Gaps and Undercutting Door Jambs
Leave a consistent 1/4-inch expansion gap along all vertical surfaces to accommodate natural plank movement. Use a jamb saw or oscillating tool to undercut door jambs cleanly, allowing the flooring to slide beneath without obstruction. Fit planks tightly into the cut space, ensuring a smooth transition between rooms.
Navigating Corners and Complex Layouts
Complex room shapes demand precise measurements and careful plank orientation. In L-shaped rooms or spaces with alcoves, dry-lay the first few rows to visualize the pattern and avoid awkward seams. Use a laser level to transfer reference lines around tight corners.
When working around angles or bay windows, trace each plank’s required shape using a template made from cardboard or spare material. Cut with a fine-tooth jigsaw blade to maintain clean edges. Fit and lock planks in open areas first, leaving perimeter pieces for last. This method reduces the number of floating cuts and improves overall alignment accuracy.
Maintaining Your SPC Flooring Post-Installation
Proper upkeep ensures your SPC flooring retains its appearance and structural integrity for years. Unlike traditional flooring, it resists moisture and indentation well but still benefits from consistent care tailored to its composite nature.
Recommended Cleaning Protocols and Products
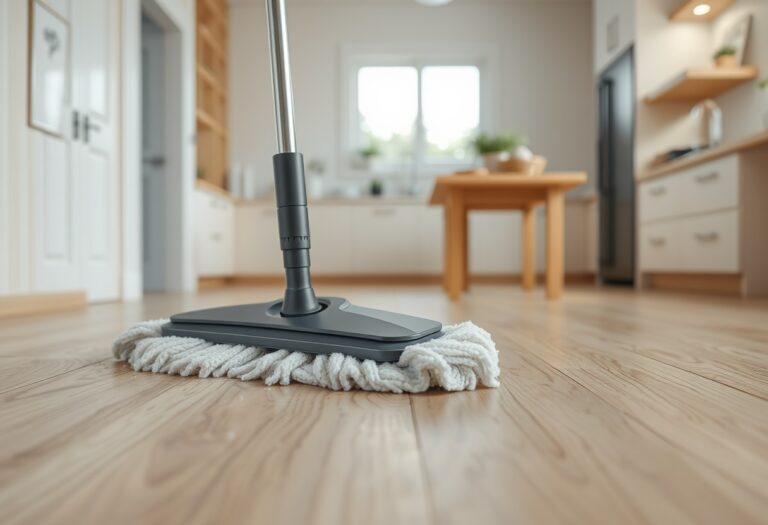
Use a soft microfiber mop or cloth with a pH-neutral cleaner to remove daily dirt and spills. Avoid abrasive pads, steam mops, or ammonia-based solutions, as these can degrade the wear layer over time.
Long-term Care to Prevent Scratches and Sun Damage
Furniture pads under legs reduce the risk of surface abrasions, while UV-blocking window treatments help prevent fading in sun-exposed areas. Regularly trim pet nails and avoid dragging heavy items across the floor.
Placing walk-off mats at entryways minimizes grit transfer, a leading cause of micro-scratches. A mid-sized SaaS firm with high foot traffic in its office space reported visibly less wear after implementing mat zones at all entrances, proving simple habits make a measurable difference over time.
Final Words
By following the detailed steps and using the correct tools outlined in this guide, you ensure a durable and visually aligned SPC vinyl floor. Proper subfloor preparation, careful plank alignment, and attention to expansion gaps directly impact long-term performance. A mid-sized SaaS firm retrofitting its office space reported fewer callbacks after adopting these installation standards, reflecting their real-world effectiveness.