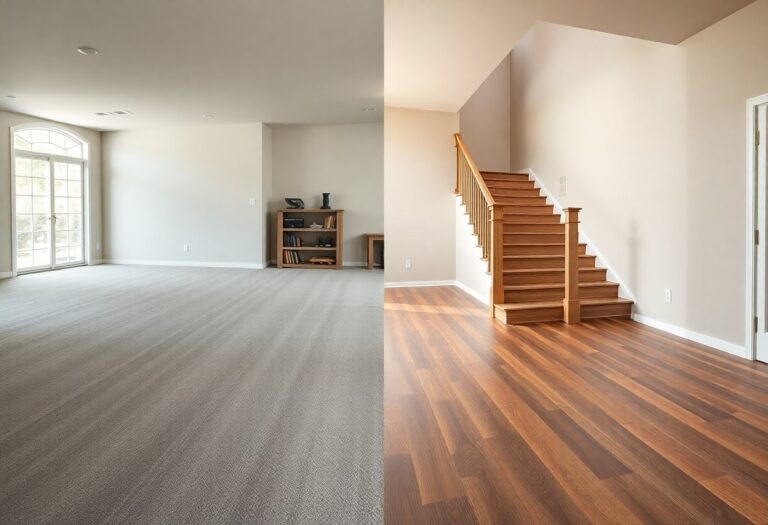
There’s a lot to consider when installing white oak flooring in your Kitchener home, and this comprehensive guide is here to simplify the process for you. From selecting the right materials to step-by-step installation techniques, you’ll find valuable tips and tricks that will help you achieve a stunning and durable floor. Whether you’re a DIY enthusiast or seeking professional assistance, this guide is tailored to meet your needs and ensure your project runs smoothly. Let’s investigate the crucials of white oak flooring installation.
This guide will equip you with the vital tips and tricks for installing white oak flooring in Kitchener. Whether you’re a seasoned DIY enthusiast or a first-time installer, you’ll find practical advice tailored to your needs. You’ll gain insights on selecting the right materials, preparing your space, and executing a flawless installation. With the right techniques, you can ensure that your new flooring not only looks stunning but also stands the test of time. Let’s investigate the details to help you achieve a successful flooring project!
Preparing Your Space for Transformation
Before exploring into your white oak flooring installation, creating an ideal workspace is vital. Clear the entire area of furniture, rugs, and other items to allow for a seamless installation process. Assess the room’s dimensions and check for any obstacles that may impede your workflow. This preparation not only enhances efficiency but also helps protect your belongings from potential damage, enabling a smoother transition to your beautiful new flooring.
Assessing Your Subfloor: Strength and Stability
Evaluate your subfloor’s condition to ensure it’s supportive enough for white oak planks. Any signs of moisture, warping, or deterioration need addressing—you should aim for a clean, flat, and dry surface. Plywood or concrete subfloors are typically optimal; however, proper installation involves ensuring they can withstand the weight and movement associated with solid hardwood flooring.
Climate Control: Ensuring Optimal Conditions for Installation
Maintaining the right climate conditions in your space prior to installation will significantly affect your flooring’s longevity and appearance. Ideally, indoor humidity levels should range between 30% to 50%, with temperatures set between 60°F and 80°F. By adjusting your heating or air conditioning system a few days prior to installation, you allow the wood to acclimate and minimize expansion or contraction post-installation.
To enhance the acclimation process, consider placing the boxes of white oak planks in the room where they will be installed. Opening the boxes for a few hours allows the wood to adapt to the room’s temperature and humidity levels, reducing the risk of gaps or warping once installed. This proactive step can extend the life of your flooring and maintain its aesthetic appeal, ensuring your investment stands the test of time.
Navigating the Selection Maze: Choosing the Right White Oak Flooring
Selecting the right white oak flooring is an adventure filled with options that can elevate your space significantly. From various styles to finishes, it’s necessary to gather information to make an informed choice. You might want to start by considering your home’s aesthetic and function, as flooring sets the stage for your entire interior. Compare samples and visualize how they interact with your existing decor, lighting, and personal style. Ultimately, the goal is to choose a flooring solution that complements and enhances your living spaces.
Evaluating Quality: What Really Matters in Flooring
Quality in flooring is defined by durability, stability, and overall craftsmanship. Look for hardwood that has a strong Janka hardness rating, which indicates its resistance to dents and wear. Additionally, consider the milling process and whether it’s precision-engineered for stability and ease of installation. Always review the warranty as well; a longer warranty often signals a higher quality product. Opting for reputable brands with a history of excellence will yield long-lasting results.
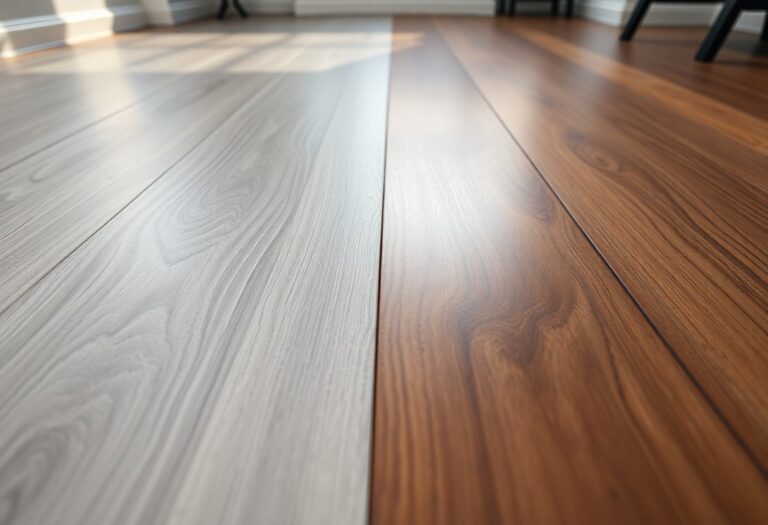
Factors Influencing Your Choice: Grain, Finish, and Color Variations
The aesthetic appeal of your white oak flooring largely depends on its grain, finish, and color variations. Oak wood features natural elements such as rays and flecks that provide a unique character, and it’s available in various grains, from straight to wavy patterns. Additionally, the finish can drastically change the look—from matte to glossy—providing different levels of sheen. You can also incorporate stunning color variations, ranging from light creams to deep, rich browns, ensuring your choice harmonizes beautifully with your overall design scheme.
- Consider the grain structure and how it affects light reflection.
- Analyze the finish type—water-based or oil-based—to determine maintenance levels.
- Choose colors that will either stand out or complement existing elements in your space.
- Explore multiple samples and test them under various lighting conditions.
- Engage with a professional for insight to match your lifestyle needs.
The ideal oak flooring enriches your home while aligning with your personal style.
When choosing grain, finish, and color variations, pay attention to how they interplay with your room’s ambiance. For instance, darker grains can evoke a sense of warmth and coziness, while lighter shades create an airy and open feel. Treatments like wire brushing can also enhance the wood’s texture, giving it a rustic charm. Explore different combinations—subtle contrasts between grain patterns and finishes can foster depth in your design. Don’t underestimate the transformative power of color; sample them outdoors and indoors to see how they respond to natural and artificial light.
- Experiment with contrast—pair dark floors with light furnishings for a striking effect.
- Incorporate patterns into your flooring layout to add interest.
- Consider the ecological impact of finishes—opt for sustainable options when possible.
- Evaluate your lifestyle needs—more wear-resistant finishes may suit busy households.
- Consult with experts for tailored suggestions and insights on trending styles.
The right combination ensures you enjoy your investment for years to come.
Choosing the Right White Oak Flooring for Your Home
Selecting the perfect white oak flooring for your home involves understanding various factors including style, grade, and finish. Prioritize your aesthetic preferences alongside the functional requirements of each room. Consider how your choice will affect the overall ambiance, taking into account the size of your space and the lighting. Whether you lean towards a rustic look or a sleek modern finish, white oak offers versatility that can align with numerous design schemes.
Distinguishing Between Grades and Finishes
Balancing Aesthetics with Durability: What You Need to Consider
Finding harmony between aesthetics and durability in your white oak flooring involves assessing the specific needs of each space. High-traffic areas like hallways may require more durable finishes to withstand wear, while bedrooms could benefit from a softer touch. Think about the long-term maintenance implications of your choice; well-finished white oak can resist scratches, while any natural wood surfaces might demand frequent upkeep depending upon your lifestyle. Ultimately, the perfect flooring strikes a balance—beautiful enough to elevate your space but resilient enough to handle your family’s everyday activities.
For example, if you have a bustling household with kids and pets, choosing a high-grade finish can protect against daily wear and tear while preserving the beauty of the wood. Conversely, if you seek a cozy cabin-like feel, a lower grade with natural imperfections may bring a unique warmth to your home. Evaluating the room’s function, foot traffic, and your personal style preferences will guide you towards a white oak flooring option that not only enhances aesthetics but also offers the necessary durability for years to come.
Preparing Your Space: Crucial Steps for a Flawless Installation
Before entering into the installation of your white oak flooring, preparing your space effectively can make all the difference. Start by removing any existing floor coverings, furniture, and baseboards to provide a clean slate. Make sure your work area is well-lit and allows for easy movement. By thoughtfully organizing your tools and materials nearby, you’ll streamline the installation process, helping to ensure that your project runs smoothly from beginning to end.
Assessing the Subfloor: Identifying Common Pitfalls
Your subfloor sets the foundation for your new wood flooring, and its condition is key to a successful installation. Inspect for any signs of moisture, unevenness, or damage. A common issue is inadequate support that can lead to squeaking and warping over time. You might find that patching low spots or replacing damaged sections creates a level surface, vital for the longevity of your white oak flooring.
Climate Control: The Role of Acclimatization in Flooring Installation
Acclimatization involves allowing your white oak planks to adjust to the temperature and humidity levels of your space before installation. Ideally, this should occur in the room where the flooring will be installed for at least 48 hours. This practice minimizes the risk of expansion or contraction after installation, which can lead to gaps or buckling. Ensuring consistent climate conditions in your home, around 60-80°F and 30-50% humidity, aids in stabilizing your flooring and promotes optimal performance over time.
During acclimatization, keep the flooring material in its packaging but allow air to circulate around it. This process enables the wood to adjust gradually to its new environment. Using a hygrometer to monitor humidity and a thermometer for temperature will help maintain the ideal climate conditions. By taking these proactive steps, you not only protect your investment but also help ensure that your new white oak flooring remains beautiful and functional for years to come.
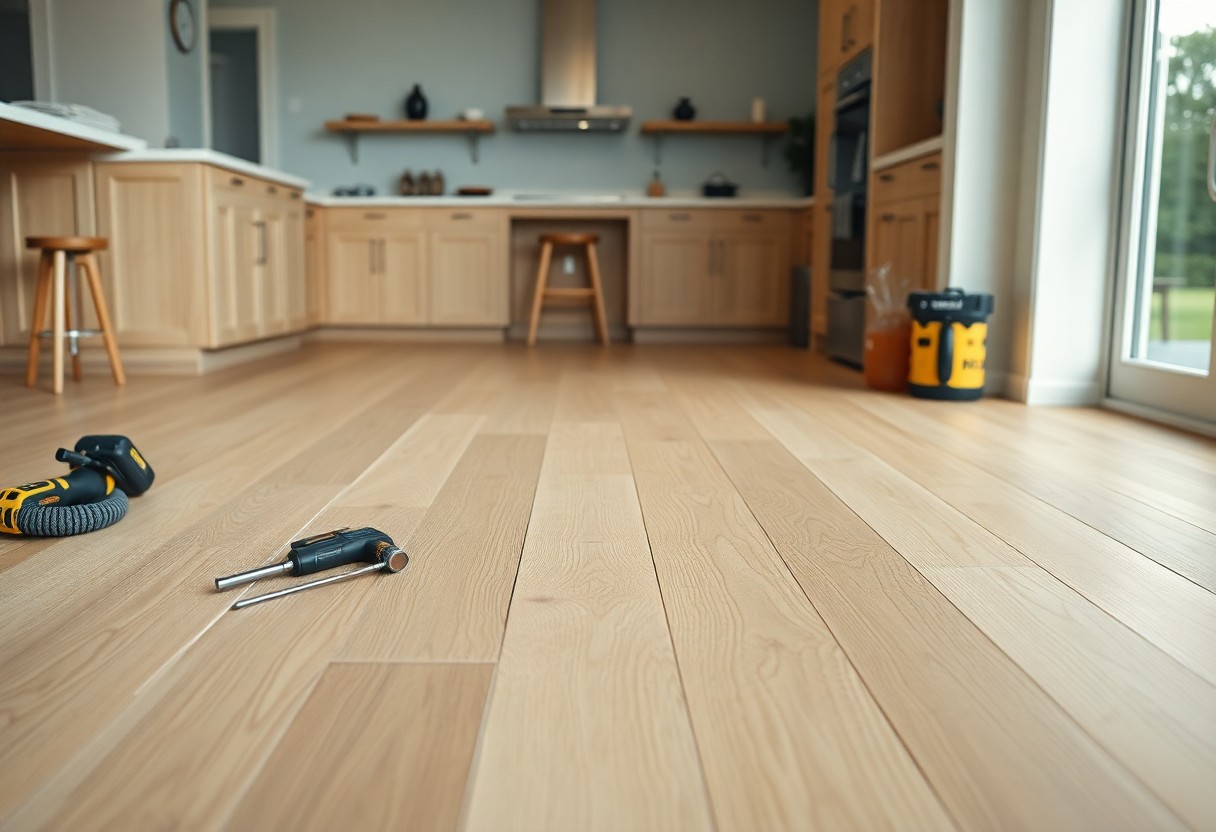
Essential Tools and Materials for a Flawless Installation
The right tools and materials make all the difference in your white oak flooring installation. A successful project begins with quality products and the necessary equipment, so gather items like a miter saw, nail gun, and moisture meter, among others. In this section, you’ll discover the must-have tools and tips for sourcing top-quality materials right here in Kitchener.
Must-Have Tools for Every DIYer
Your toolkit should include a variety of important tools, such as a pry bar for removing old flooring, a tape measure for precise measurements, and a flooring nailer for securing boards. A circular saw is also invaluable for cutting your planks to size. Keep safety gear, like gloves and goggles, on hand to protect yourself during the process. By ensuring you have these tools ready, you’ll streamline your workflow and achieve a professional finish.
Sourcing Quality Materials: Finding Local Vendors in Kitchener
Kitchener boasts several local vendors where you can find high-quality white oak flooring at competitive prices. Stores such as Home Hardware, Capitol Floors, and Kitchener-Waterloo Home Improvement Center are excellent starting points. Each offers a diverse selection, allowing you to compare different grains, finishes, and pricing options that suit your budget and aesthetic preferences.
On your search for materials, consider visiting these local vendors during weekdays when they might have more staff available to assist you. Many stores offer expert advice and can guide you through selecting the right grade of white oak based on your specific installation needs. Some vendors also provide samples, so you can test how the flooring looks in your space before making a commitment. Local carpenters often have insights into the best shops for your flooring materials, so don’t hesitate to ask for recommendations. This ensures a purchase that aligns with your desired quality and style while also supporting local businesses.
Mastering the Installation Techniques: Strategies for Success
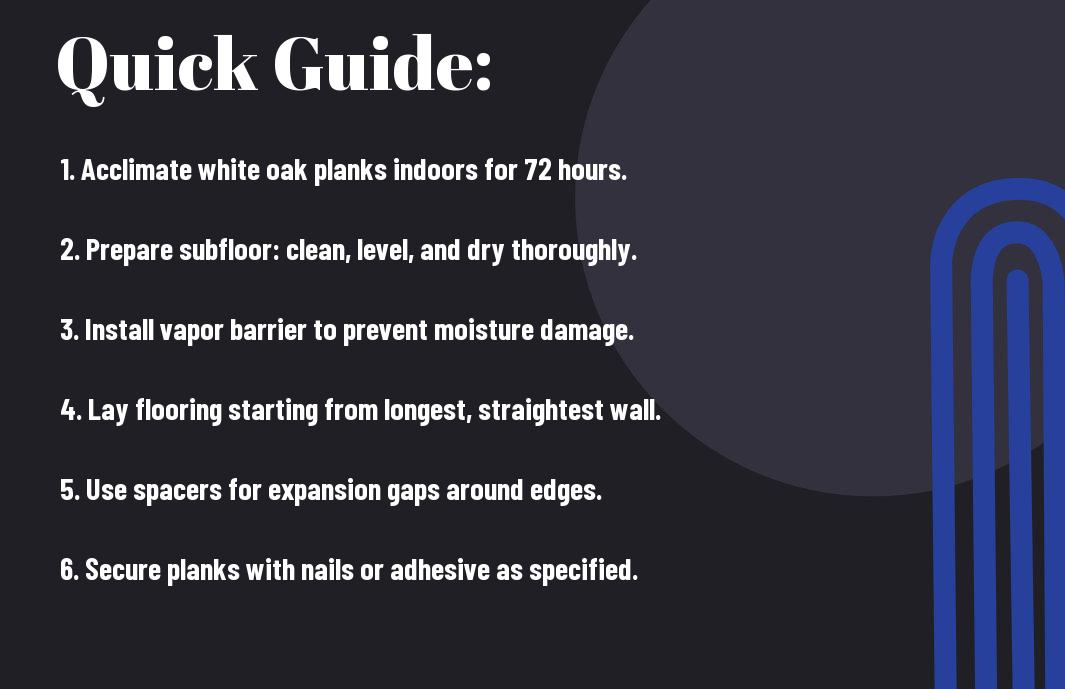
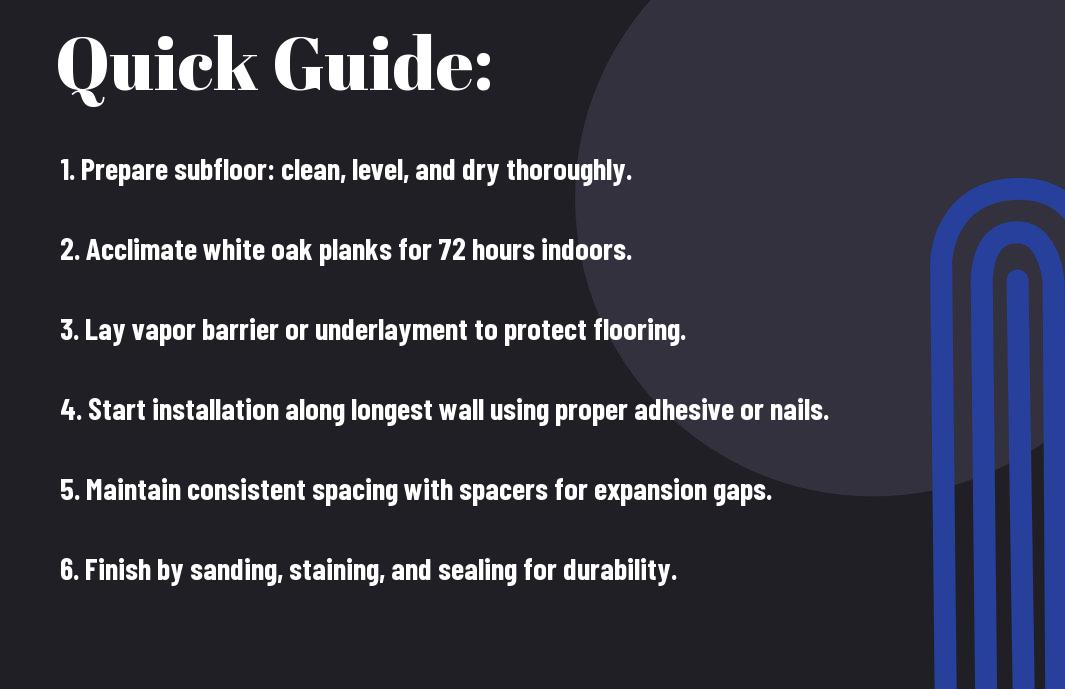
Mastering installation techniques is crucial for achieving a stunning white oak floor that lasts. Understanding the specifics of layout, acclimation, and moisture control can elevate your project significantly. Start by planning the direction of your boards; running them parallel to the longest wall tends to create an expansive feel. Additionally, acclimating your hardwood for 72 hours in the room it will be installed prevents warping and issues later on. With the right strategies in hand, you’ll be well on your way to a successful installation.
Tools of the Trade: Essential Equipment for DIY Installers
Equipping yourself with the right tools simplifies the installation process. Essential tools include a flooring nailer or stapler for secure fastening, a miter saw for precise cuts, and a tape measure for ensuring accuracy. A pry bar helps with snug fitting while spacers maintain proper expansion gaps around walls. Investing in a quality knee pad can also save your knees during long sessions. Each tool plays a vital role in making your installation hassle-free.
Common Installation Methods: Advantages and Disadvantages
Understanding various installation methods sets the stage for success. The three main techniques are nail-down, glue-down, and floating installations. Each has its pros and cons, which can impact the longevity and aesthetics of your floor. A nail-down installation is sturdy and typically used for solid hardwood, but requires a wooden subfloor. Glue-down offers strong adhesion on concrete, yet can be labor-intensive. Floating floors are easier for DIYers and work well over several subfloor types, but may not withstand heavy foot traffic as effectively.
Nail-down installations provide long-term durability and a traditional feel, making them a popular choice for solid white oak flooring. However, they demand a wooden subfloor and more time for setup. Conversely, glue-down methods create a strong bond to concrete, perfect for basements, though they require proper adhesive and are often messier. Floating floors, while easier to install without nails or glue, may shift under heavy loads and could transmit sound differently. Balancing these options against your needs ensures the best results for your project.
Step-by-Step Installation Techniques: From Start to Finish
Embarking on the installation process of white oak flooring requires a clear plan and meticulous execution. Start by preparing your subfloor; it should be clean, dry, and level. Next, acclimate your flooring planks to the room’s moisture levels for at least 48 hours. Once prepared, lay out the first row of planks, ensuring they’re straight and aligned. Utilize appropriate installation techniques—whether click-lock or glue-down. Finish with proper trim and molding installation to give your flooring a polished look. Follow these steps closely for a successful installation from beginning to end.
The Click-Lock Method vs. Glue-Down Approach: Pros and Cons
Deciding between the click-lock method and the glue-down approach can significantly impact your installation experience and ultimately, your flooring’s longevity. Each method offers unique advantages and challenges.
| Pros | Cons |
|---|---|
| Quick and easy installation | Requires a perfectly level subfloor |
| No need for adhesives or nails | Can be prone to movement if not installed snugly |
| Easier to replace individual planks | Higher noise levels when walking |
| Less drying time required | Less moisture-resistant |
| Potential for DIY without experience | Limited to specific flooring types |
| Allows for easier subfloor repairs later | Can develop gaps over time |
| Improved thermal properties | More potential for expansion and contraction |
| More straightforward maintenance | Limited warranty options may apply |
| Variety of designs available | May feel less sturdy underfoot |
| Makes DIY installation more appealing | Requires more preparation time |
Expert Tips for Cutting and Fitting Your Floor Planks
Accurate cutting and fitting of your floor planks sets the stage for a professional-looking installation. Utilize a miter saw for precise angle cuts and ensure you measure carefully before every cut to avoid costly mistakes. Always cut with the better side facing up to achieve a flawless finish. Check planks for any imperfections before installation, and stagger your plank patterns for a visually appealing layout.
- Double-check measurements before you cut.
- Use a straight edge to guide your cuts.
- Dress your saw blades regularly for clean cuts.
- Wear safety goggles and hearing protection during cutting.
- Use a floor spacer to maintain even expansion gaps.
- Consider labeling each plank for easier installation.
Precise cuts ensure that each piece fits together seamlessly, enhancing the aesthetic of your flooring. Always account for expansion gaps as this helps moisture management and long-term durability. Utilize spacers at the walls to maintain uniformity and avoid unsightly buckling. Plan your layout in advance, sketching where each plank will go and staggering joints to break up seams. Ensuring you’re prepared will save you time and stress during your installation. Any mistakes can lead to additional costs or extended project timelines, so focus on accuracy.
- Practice your cuts on scrap pieces to refine technique.
- Have a dedicated workspace for cutting and measuring.
- Be patient; take your time to get each cut right.
- Consult online videos for visual guidance if needed.
- Keep tools organized to avoid losing track of materials.
- Double-check the fit of each plank as you progress.
Any advice you embrace during the cutting and fitting stage will contribute to achieving an inviting, stunning white oak floor that enhances the beauty of your home.
Ensuring Longevity: Maintenance Tips for White Oak Floors
White oak floors can last for generations with the right care. Regular maintenance will keep your flooring looking beautiful while also extending its lifespan. Adhere to these necessary upkeep tips to ensure your white oak floors remain stunning:
- Use a damp mop instead of a wet one to clean surfaces.
- Avoid harsh chemicals; use pH-neutral cleaners made for wood floors.
- Place rugs at entryways to minimize dirt and debris.
- Maintain a stable humidity level in your home to prevent warping.
- Schedule professional cleaning and refinishing every few years.
Any neglect in maintenance can lead to wear that diminishes the beauty of your investment.
Daily Care Practices: Keeping Your Floor Pristine
Your daily care is vital in maintaining the pristine appearance of your white oak flooring. Sweep or vacuum regularly to prevent dirt and grit from scratching the surface. A microfiber mop dampened with a wood floor cleaner will help to keep your floors fresh. For spills, address them immediately with a soft cloth to avoid staining. Avoid walking with high heels or dragging heavy furniture across the floor to minimize damage.
Long-Term Strategies: Protecting Against Wear and Tear
Investing in protective measures will guard your white oak floors against wear and tear over time. Use felt pads under furniture to prevent scratches and consider investing in area rugs for high-traffic zones. Implement a no-shoes policy indoors to further minimize dirt and debris, and regularly check for any signs of water damage or wear that may require timely repair.
To safeguard your floors from long-term damage, consider applying a high-quality finish or sealant every few years to create a barrier against moisture and scratches. Additionally, maintaining an optimal indoor climate helps prevent contraction and expansion, reducing the risk of gaps or buckling. Regular adjustments to your maintenance routine as seasons change can also keep your floors looking their best, ensuring that they remain a centerpiece in your home for decades.
Post-Installation Care: Ensuring Longevity and Beauty
Post-installation care plays a significant role in maintaining the elegance and durability of your white oak flooring. Once your new floors are in place, it’s vital to adopt a routine of cleaning and protection to prevent wear and tear. Regular sweeping or vacuuming, combined with occasional damp mopping, will keep dirt and debris at bay. Additionally, placing mats at entryways and using furniture pads can significantly reduce scratches and dents, allowing your floors to shine for years to come.
Maintenance Essentials: Cleaning and Protecting Your White Oak Floors
Your white oak floors deserve the best care, and that starts with regular cleaning. Use a soft-bristle broom or a vacuum designed for hard surfaces to remove dirt without scratching the finish. Damp mopping with a pH-neutral cleaner specifically made for hardwood keeps your floors fresh without damaging the wood. To protect against wear, consider reapplying a finish every few years, especially in high-traffic areas, ensuring your investment remains beautiful.
Dealing with Common Issues: Scratches, Gaps, and Water Damage
Even with proper care, issues such as scratches, gaps, or water damage can arise over time. For scratches, a simple touch-up kit can blend the damage into your floor seamlessly. If you encounter gaps between planks, filling them with wood filler or wood glue can help restore the visual continuity. In cases of water damage, it’s advisable to dry the area immediately and assess whether the affected boards need replacing or resurfacing.
Addressing scratches promptly can preserve your white oak’s finish and aesthetic appeal. A touch-up pen provides a straightforward solution for small scratches, while deeper damage may require sanding and refinishing. Gaps can appear as your flooring undergoes seasonal expansion and contraction; applying a floor filler designed for hardwood will seamlessly close these gaps. Water damage demands swift action; constant exposure can warp and discolor wood. For minor spills, a towel should suffice, but serious damage might necessitate professional repair or replacement to maintain long-term beauty and function.
The Cost-Benefit Analysis: Is White Oak Flooring Worth the Investment?
Investing in white oak flooring may seem like a significant upfront cost, but the long-term benefits often outweigh the initial expenses. Given its aesthetic appeal, durability, and ability to increase property value, many homeowners find that white oak flooring pays for itself over time. With proper maintenance, these floors can last for decades, making them a wise choice for both immediate and future returns on investment.
Initial Costs vs. Long-Term Value: A Financial Perspective
While the price point for white oak flooring can range from $5 to $10 per square foot, consider that its longevity, often exceeding 50 years with proper care, translates to a lower cost per year compared to cheaper alternatives. Investing in quality flooring means fewer repairs and renovations down the line, leading to significant savings if you plan to stay in your home over the long term.
Aesthetic Impact: Enhancing Home Value with White Oak
White oak flooring significantly enhances your home’s aesthetic appeal, attracting potential buyers and increasing your property’s market value. The rich colors, distinctive grain patterns, and timeless look create a sophisticated ambiance that complements various interior styles.
Regarding enhancing your home’s value, white oak flooring stands out in the real estate market. According to a recent study, hardwood floors can increase the resale value of a home by 2.5% to 5%, making them an attractive feature for prospective buyers. The neutral tones and versatility in design allow for seamless integration with any décor, making your home more appealing and market-ready. As trends continue to favor natural materials, your investment in white oak flooring not only enriches your living space but also positions your property for a lucrative future sale.
Final Words
With these considerations in mind, you are well-equipped to approach your white oak flooring installation in Kitchener with confidence. Using the tips and tricks outlined in this guide, you can ensure a successful and smooth installation process, allowing your new floors to elevate your space beautifully. Take the time to plan and prepare effectively, and enjoy the benefits of your stylish and durable flooring in the long run.
Final Words
Drawing together the insights from this ultimate guide to white oak flooring installation in Kitchener, you now have the tools and knowledge to make informed decisions throughout your project. By following these tips and tricks, you can ensure a seamless installation process that enhances your home’s beauty and value. Take your time to plan, prepare, and execute, and you’ll be rewarded with beautifully installed flooring that stands the test of time.