

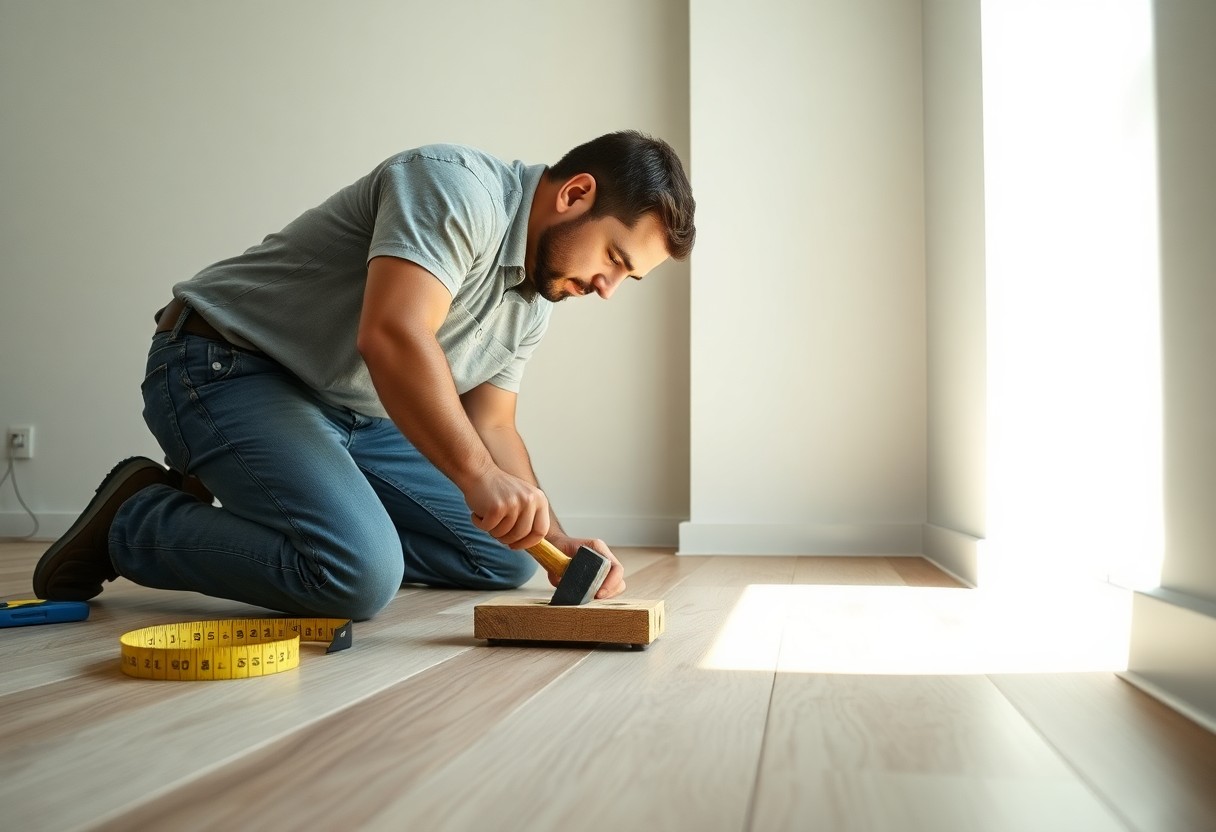
vinyl flooring transforms spaces with durability and style, and SPC vinyl takes performance further with its rigid core and realistic finishes. You achieve best results by understanding material behavior, subfloor requirements, and installation nuances that prevent common issues like gapping or uneven edges. A mid-sized SaaS firm renovating its office space saw immediate aesthetic and acoustic improvements after proper SPC installation.
Exploring SPC Vinyl Types
SPC vinyl comes in multiple configurations, each suited to different environments and performance needs. Your selection impacts durability, comfort, and visual appeal. Consider these core variations when making your choice.
| Core Composition | Stone polymer composite with limestone and PVC |
| Thickness Range | 4 mm to 8 mm, affecting dent resistance |
| Wear Layer Options | 12 mil to 20+ mil for residential and commercial use |
| Installation Method | Click-lock, glue-down, or loose lay |
| Water Resistance | Fully waterproof; ideal for basements and bathrooms |
- Rigid core for superior stability
- High-density construction resists dents
- Multiple embossed textures mimic natural materials
- Variety of plank and tile visuals available
The right type aligns with your room’s traffic level and aesthetic goals.
Rigid Core Construction and Density
You benefit from a stable, warp-resistant surface due to the rigid core’s high compressive strength. This dense layer prevents indentation from heavy furniture and resists movement over minor subfloor imperfections. The core’s composition ensures long-term structural integrity.
Surface Textures and Visual Options
You can choose from matte, satin, or textured finishes that replicate the grain of oak, the veining of marble, or the surface of concrete. These embossing techniques align precisely with the printed pattern for realism. The tactile surface reduces slip risk and hides scuffs.
Surface textures are created through embossing in register (EIR), where the embossed pattern matches the printed design pixel for pixel. This alignment enhances depth perception, making a plank appear truly three-dimensional. Some lines incorporate micro-beveled edges to further mimic individual tiles or boards, increasing authenticity under changing light conditions.
Analyzing Pros and Cons
Understanding the strengths and limitations of SPC vinyl flooring helps you make informed decisions tailored to your project’s demands. The following breakdown highlights real-world factors that influence performance, cost, and long-term satisfaction in residential and commercial installations.
| Pros | Cons |
| Highly resistant to scratches and dents | Can feel hard underfoot without proper underlayment |
| Stable core minimizes expansion and contraction | Limited acoustic insulation compared to softer floors |
| Waterproof-ideal for kitchens and bathrooms | Not suitable for uneven subfloors without prep |
| Low maintenance with routine sweeping and damp mopping | May show grout line imperfections if embossed |
| Wide range of realistic wood and stone visuals | Adhesive residue can be difficult to remove if glued |
| Compatible with radiant heating systems | Some products emit volatile compounds during installation |
| Longer lifespan than traditional vinyl | Heavier than other LVT types, increasing labor effort |
| Click-system planks allow DIY-friendly installation | Repairs are nearly impossible without visible seams |
| Resists fading from UV exposure | Edge chipping can occur with improper handling |
| Cost-effective over time due to durability | Not biodegradable; environmental impact varies by brand |
Primary Advantages of SPC Flooring
SPC flooring stands out for its exceptional durability and moisture resistance, making it a reliable choice for high-traffic areas and wet environments. Its rigid core supports heavy furniture without indenting and maintains dimensional stability across temperature shifts, reducing long-term maintenance needs in homes and rental properties.
Common Drawbacks and Practical Considerations
While SPC offers many benefits, its hardness can lead to discomfort during prolonged standing and may require an underlayment for sound reduction. Installation over imperfect subfloors often demands additional prep work to avoid telegraphing imperfections through the surface.
Some installers report challenges with cutting thicker SPC planks, as standard utility knives may not suffice and power tools generate more dust. A mid-sized SaaS firm retrofitting its office space noted increased labor time due to the weight of the planks and the need for precise alignment in large open areas. Acoustic performance remains a concern in multi-level buildings where impact noise travels between floors, prompting some to use premium underlayments despite added cost.
Critical Pre-Installation Factors
Proper planning before laying SPC vinyl ensures lasting performance and a clean visual result. Address these key elements to avoid callbacks or material damage.
- Confirm subfloor flatness within 3/16 inch over 10 feet
- Test concrete slabs for moisture using a calcium chloride test or RH probe
- Inspect for cracks, debris, or uneven transitions
- Allow planks to acclimate per manufacturer specifications
- Verify room temperature remains stable during and after installation
Knowing these conditions are met reduces the risk of warping, gapping, or adhesive failure over time.
Subfloor Preparation and Moisture Control
A smooth, clean, and dry subfloor is non-negotiable for SPC vinyl. Any imperfection will telegraph through the thin wear layer. Sweep thoroughly, repair dips or humps, and use a moisture barrier on concrete if testing indicates elevated levels. Floating installations still require flatness to prevent edge lipping.
Room Acclimatization Requirements
SPC planks must adjust to the room’s temperature and humidity before installation. Leave unopened boxes flat in the installation area for at least 48 hours. This stabilizes the core, minimizing post-installation expansion or contraction.
Temperature fluctuations and humidity shifts cause rigid core materials to expand or contract slightly. Installing planks straight from a cold warehouse or hot truck risks gaps or buckling once the material adjusts. A mid-sized SaaS firm retrofitting its office space reported visible gaps within a week due to skipping acclimatization. Letting the product rest in the final environment ensures dimensional stability and a tight, professional joint fit.
Step-by-Step Installation Guide
Follow this structured approach to ensure each phase of your SPC vinyl flooring installation builds on the last, resulting in a precise and durable finish that mirrors professional workmanship.
| Phase | Action |
| Preparation | Acclimate planks for 48 hours and inspect the subfloor for flatness and moisture. |
| Layout | Begin alignment from the longest wall, leaving a 1/8-inch expansion gap at all perimeters. |
| Installation | Use the click-lock method to join planks, tapping with a rubber mallet if needed. |
| Finishing | Install baseboards or quarter-round molding to conceal expansion gaps. |
Initial Layout and Row Alignment
Start your first row along the longest straight wall, not the doorway, to maintain visual balance. Position planks with the tongue facing the wall and use spacers to maintain a consistent 1/8-inch gap for expansion.
Click-Lock Engagement and Cutting Methods
Angle the next plank into place at a 30-degree tilt, then press down until it clicks securely. For cuts, use a fine-tooth circular saw or a utility knife with a straightedge for clean, splinter-free edges on straight lines.
When engaging click-lock planks, ensure the groove and tongue are free of debris to avoid misalignment. For intricate cuts around pipes, mark the plank precisely and use a jigsaw with a fine blade to maintain accuracy. A mid-sized SaaS firm managing office renovations reported fewer callbacks when installers pre-cut all edge pieces before advancing to the next row.
Professional Tips for a Seamless Finish
Proper acclimation, precise cutting, and consistent locking techniques make a visible difference in final appearance. Use a tapping block to avoid edge damage, maintain a consistent plank orientation throughout the room, and stagger end joints by at least 6 inches for visual balance. This attention to detail results in a finish indistinguishable from professional installations.
- Always leave expansion gaps along perimeter walls
- Cut planks with a fine-tooth blade to prevent chipping
- Use a pull bar for tight final rows
- Check alignment every few rows with a straight edge
- Install transitions every 30 feet in large open areas
This disciplined approach ensures structural stability and aesthetic coherence across the entire floor.
Managing Expansion Gaps and Doorways
SPC vinyl expands and contracts with temperature shifts, requiring a 1/4-inch gap at all fixed boundaries. Trim door jambs with a handsaw to slide planks underneath, maintaining a clean look without visible gaps. This preserves movement space while achieving a built-in appearance at thresholds.
Utilizing Transitions and Molding
Transitions bridge height differences between rooms and protect edges at abrupt floor changes. Choose T-molding for adjacent rooms with similar levels and reducer strips for exits to lower surfaces like carpet. This ensures both durability and visual continuity across zones.
Matching transition finishes to the flooring’s color and texture avoids visual disruption, especially in open-concept spaces. Aluminum, wood, or vinyl options accommodate different subfloor conditions and traffic loads. A mid-sized SaaS firm retrofitting its office used beveled vinyl reducers to connect hallways with conference rooms, maintaining a unified aesthetic without costly subfloor modifications.
Long-Term Maintenance and Care
Preserving the appearance and integrity of your SPC vinyl flooring depends on consistent, thoughtful upkeep. Daily dust mopping and periodic cleaning with manufacturer-approved solutions prevent buildup that dulls the surface. Avoid steam mops or excessive water, which can compromise seams over time. A mid-sized SaaS firm retrofitted its office with SPC flooring and maintained sheen for over three years using only pH-neutral cleaners and scheduled inspections.
Protective Cleaning Regimens
Regular cleaning with a soft microfiber mop removes fine grit that can act as an abrasive over time. Use a damp, not wet, mop and immediately wipe up spills to prevent seepage at the seams. Cleaning once weekly with a solution specifically formulated for luxury vinyl maintains the finish without leaving residue that attracts more dirt.
Preventing Scratches and Surface Wear
Felt pads under furniture legs reduce the risk of surface damage during everyday use. Rearranging furniture periodically prevents localized wear in high-traffic zones. Avoid dragging heavy items across the floor, even when moving small appliances or office equipment.
Hard-soled footwear and pet claws contribute to fine surface abrasions that accumulate over months. Placing entry mats at doorways traps outdoor debris before it reaches the floor. In commercial settings, adding protective walk-off mats in reception areas has reduced visible wear by limiting grit transfer from street-level entrances.
Final Words
When you follow the correct procedures and pay close attention to subfloor preparation, acclimation, and precise cutting, your SPC vinyl flooring achieves a finish that rivals professional installations. Installing planks with consistent pressure and using the right tools for trimming edges ensures tight seams and long-term durability. A mid-sized SaaS firm retrofitting its office space reported cleaner sightlines and fewer callbacks after adopting these techniques. You maintain the floor’s appearance over years by adhering to simple cleaning routines and avoiding abrasive tools. Proper installation isn’t just about the process-it’s about the lasting impression.