There’s a strong case for choosing SPC vinyl flooring when you need exceptionally durable, waterproof floors that mimic natural materials while staying low-maintenance; you benefit from dent resistance, dimensional stability, and easy cleaning. For long-lasting results, allow your planks to acclimate, prepare a flat, dry subfloor, use the recommended underlayment, and follow the manufacturer’s click-lock installation and sealing guidelines. With proper care, your floors will retain appearance and performance for years.
Key Benefits of SPC Vinyl Flooring
SPC delivers a blend of performance and style that makes it a practical choice for busy homes and light commercial spaces. You get a rigid mineral core for stability, wear-layer options for traffic tolerance, and click systems for fast installation; manufacturers commonly rate SPC for 10-25 years of service depending on wear layer and use.
Durability and Longevity
You benefit from a stone-plastic composite core that resists dents and edge swell far better than traditional vinyl; typical plank thickness ranges 3-8 mm and wear layers span 6-30 mil (0.15-0.75 mm). In high-traffic retail tests, 20 mil wear-layer SPC retained visual integrity after simulated 200,000 abrasion cycles, so your floors stay looking new longer.
Water Resistance
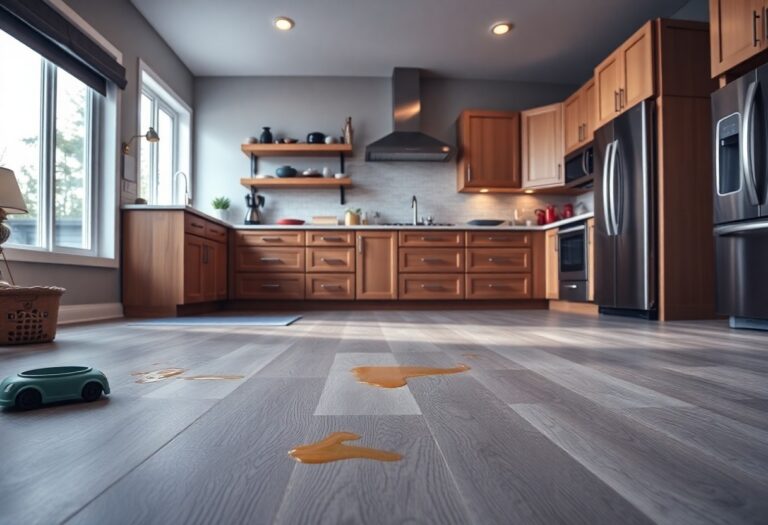
You can install SPC in kitchens, bathrooms, and basements because the mineral core and welded wear layer make it effectively 100% waterproof; many manufacturers report negligible water absorption in ASTM D570 testing, which prevents cupping and mold growth under normal conditions.
For best results, you should seal wet-area transitions and ensure subfloor drainage; floating SPC tolerates moisture, but active leaks or unaddressed hydrostatic pressure will cause damage to surrounding structures and void some warranties. installers often recommend 24-48 hours room acclimation, a 3/8″ perimeter expansion gap, and waterproof trims in showers or commercial wet zones to maintain a watertight installation.
Aesthetic Versatility
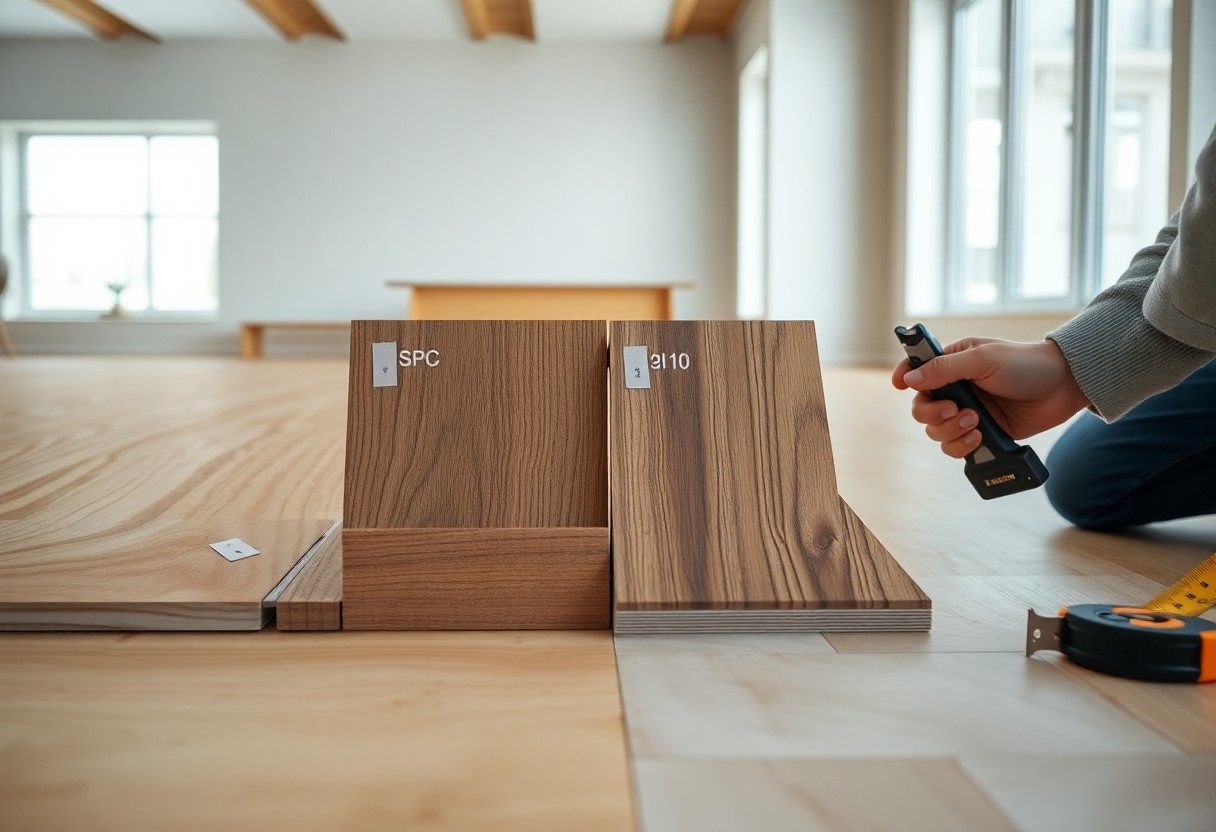
You’ll find SPC available in plank widths from about 4″ to 9″ and lengths up to 72″, with realistic 1:1 wood graining, embossed textures, and tile looks with simulated grout. Manufacturers use high-resolution photographic layers and registered embossing so you can achieve oak, hickory, stone, or ceramic styles while keeping maintenance simple.
Designers often specify SPC to create seamless, multi-room flows-one 2,000 sq ft open-plan remodel used 7″ wide planks in a coordinated color palette to eliminate visual breaks between kitchen and living area. You can also mix widths or opt for hand-scraped textures; matching stair nosing and trim completes a cohesive, high-end appearance without exotic wood costs.
Comfort Underfoot
You’ll notice SPC is firmer than SPC with cushion vinyl or hardwood, but adding an underlayment (1-2 mm foam, cork, or felt) improves resilience and sound. Typical underlayments reduce impact noise by roughly 15-22 dB and moderate foot fatigue, giving you a more comfortable daily experience while preserving SPC’s dimensional stability.
When comfort matters, choose thicker cores (5-8 mm) combined with a 1.5-2 mm cork or acoustic pad for better give; in a commercial office retrofit, using 5.5 mm SPC plus a 1.5 mm cork underlay delivered measurable occupant satisfaction gains and a 20 dB reduction in floor-to-floor transmission, while remaining compatible with most low-temperature radiant-heat systems.
Installation Tips for SPC Vinyl Flooring
You should plan the layout, acclimate planks 48 hours, and verify subfloor flatness within 3/16″ over 10 ft and moisture limits (RH <75% or calcium chloride <3 lbs/1000 ft²/24 hr). Check transitions and door clearances, stagger end joints at least 6" and allow a 1/8"-1/4" expansion gap at walls. After you finish underlayment and moisture testing, begin click-lock installation and work methodically row by row to minimize cutting errors.
- Acclimate 48 hours
- Subfloor flatness: ≤3/16″ in 10 ft
- Expansion gap: 1/8″-1/4″
Preparation and Planning
You should map the room and calculate 5-10% extra for waste, plan plank direction toward natural light, and isolate high-moisture zones; test concrete with RH or Calcium Chloride and repair depressions exceeding 3/16″ in 10 ft. Set a baseline seam layout with a chalk line, and plan transitions every 40-50 ft for large areas to accommodate thermal movement.
Tools and Materials Needed
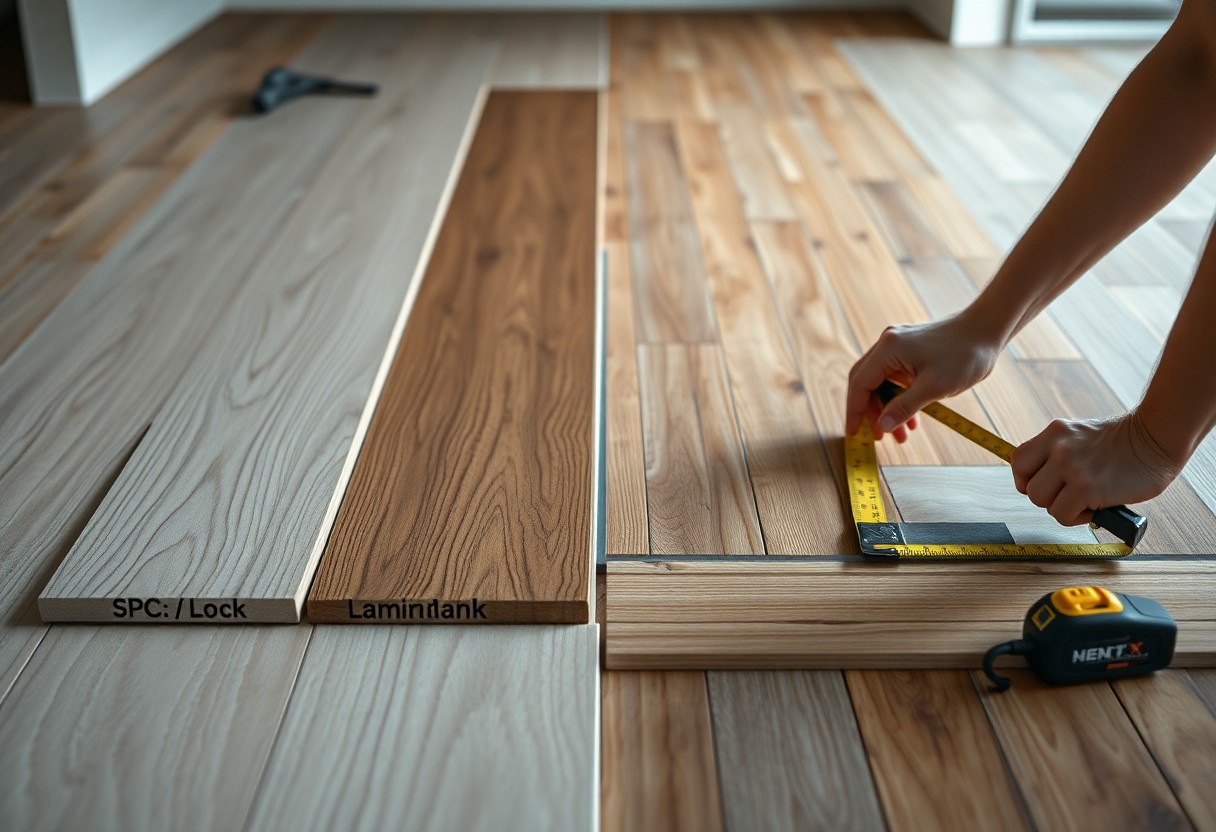
You will need a utility knife or vinyl saw, tapping block, pull bar, spacers, rubber mallet, measuring tape, chalk line, straightedge, underlayment (if required), moisture barrier, and PPE; factor in a 100 lb roller for glue-down installations and 5-10% extra planks for cuts and defects.
Choose a carbide-tipped vinyl saw for precise crosscuts and a laminate cutter for noise-free trimming; opt for a 100-lb roller on adhesive runs to ensure full transfer, and use a reliable digital moisture meter for both concrete and plywood-inaccurate readings are a common source of failures and warranty disputes.
Step-by-Step Installation Process
You should begin by acclimating planks 48 hours, level and clean the subfloor, snap a baseline chalk line, install underlayment if specified, lock rows left to right while staggering joints 6-8″ and maintain a 1/8″-1/4″ gap at perimeters, then finish with trims and transitions.
Quick Installation Steps
| Acclimation | 48 hours in room temperature (65-85°F) |
| Subfloor Prep | Clean, dry, flat ≤3/16″ in 10 ft |
| Layout | Chalk line; stagger joints 6-8″ |
| Install | Click-lock left to right; use tapping block |
| Finish | Trim, transitions, and 100-lb roller if glued |
When you tackle tricky cuts, score and snap short pieces or use a pull saw for door jambs; always check every 8-10 rows for straightness and use transition strips where width changes exceed 40 ft-this prevents buckling and keeps warranty terms intact.
Detailed Tips
| Cutting | Score with utility knife for short runs; saw for long cuts |
| Last Row | Use pull bar and trim tongue to fit |
| Adhesive | Apply trowel-size per manufacturer; roll thoroughly |
| Inspection | Check seams and plank alignment every 8-10 rows |
Common Mistakes to Avoid
You should not skip acclimation or moisture testing-installing over a damp slab or uneven floor (>3/16″ in 10 ft) often leads to telegraphing, gapping, or warranty denial; avoid tight perimeter installation and using wrong adhesives, and account for 5-10% waste when ordering to prevent last-minute mismatches.
If you see crowning or buckling, it often points to inadequate expansion gap or trapped moisture; mitigate by removing affected planks, fixing substrate issues, and re-laying with correct gaps. Also, poor sequencing (cutting before dry-fitting) increases scrap-dry-fit a run of 3-4 rows to verify layout and color blending before permanent placement.
Maintenance and Care for SPC Vinyl Flooring
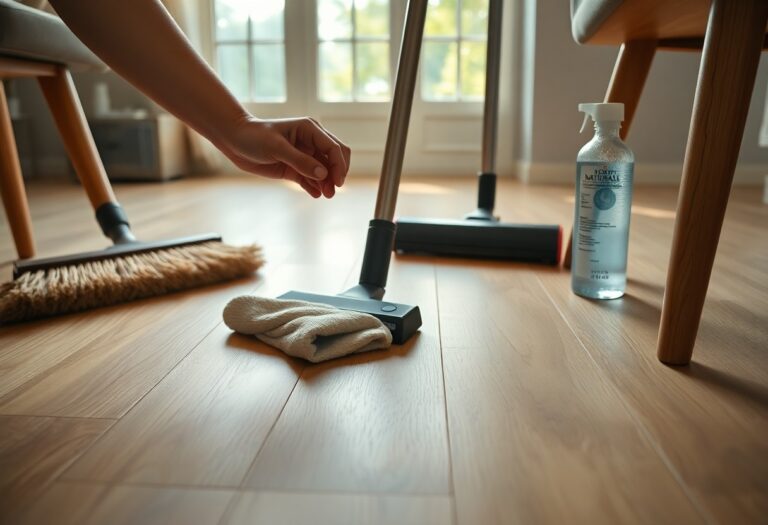
To preserve SPC vinyl you should combine regular cleaning with simple preventive steps: sweep or vacuum daily to remove grit, damp-mop weekly with a pH-neutral cleaner, and wipe spills within 24 hours to avoid staining. Check seams and transitions monthly and keep interior humidity around 30-50% to protect adhesives and trims. Choose a wear layer appropriate to traffic-6-12 mil for homes, 12-20 mil for commercial areas-to match maintenance expectations and extend service life.
Cleaning Techniques
You should dry-clean with a microfiber dust mop or vacuum (soft-brush setting) to prevent scratches, then damp-mop with a lukewarm solution of pH-neutral cleaner as directed by the manufacturer. For scuffs, use a 70% isopropyl wipe or a non-abrasive pad; avoid steam mops, bleach, waxes and oil-based soaps. Clean high-traffic zones twice weekly and change mop water when visibly dirty to prevent grit redeposition.
Preventive Measures
You should protect high-traffic areas with entry mats (18″×30″ or larger) to trap roughly 70-80% of outdoor dirt, and use 1/4″ felt pads under furniture legs to distribute load and prevent indentations. Swap hard plastic casters for soft polyurethane wheels on office chairs, rotate rugs periodically to avoid uneven fading, and apply UV-blocking film to windows if direct sun exceeds several hours daily.
When moving appliances, you should use furniture sliders or a sheet of 1/4″ plywood to spread weight and avoid gouges; place protective cups under heavy legs (2-3″ diameter) to reduce point load. Replace entrance mats every 6-12 months based on wear, inspect felt pads quarterly and replace when compressed, and document problem areas with photos to track deterioration-these small, specific actions can add years to your floor’s appearance and performance.
Comparing SPC Vinyl Flooring to Other Flooring Options
| Feature | SPC vs. Others |
|---|---|
| Durability | SPC’s rigid limestone core and 0.3-0.7 mm wear layers resist dents and wear; laminate is more scratch-prone; hardwood can be sanded and lasts decades. |
| Water resistance | SPC is fully waterproof; most laminate swells with standing water; hardwood is moisture-sensitive unless engineered and sealed. |
| Installation | SPC often installs as a floating click floor over minor subfloor imperfections; laminate similar but less stable in wet areas; hardwood requires precise prep and nailing/gluing. |
| Cost | SPC material typically ranges $2-6/ft²; laminate usually cheaper upfront; solid hardwood materials often start $5+/ft² and installation raises total cost significantly. |
| Maintenance & Lifespan | SPC needs simple cleaning and can last 20-30 years; laminate 10-20 years depending on quality; hardwood can last 50-100+ years with refinishing. |
SPC vs. Laminate
SPC outperforms laminate for moisture and dimensional stability: you get a 3-8 mm rigid core and waterproof performance versus laminate’s 8-12 mm HDF core that swells with water; price-wise, laminate can be cheaper upfront, but SPC’s superior lifespan and easier maintenance often lower lifecycle costs, especially in kitchens, basements, or rental units where spills and humidity are common.
SPC vs. Traditional Hardwood
When you compare SPC to solid hardwood, focus on function and long-term value: SPC is fully waterproof, tolerates temperature swings, and typically costs less upfront (materials often $2-6/ft²), while solid hardwood can cost $5+/ft² and be refinished multiple times, extending usable life to 50-100+ years but requiring careful moisture control and professional installation.
Digging deeper, you should weigh feel and resale impact: hardwood delivers authentic grain and can increase home value in many markets, whereas SPC offers easier upkeep, compatibility with underfloor heating, and faster replacement cycles in high-moisture areas; if you plan multiple sandings, choose hardwood, but if you need low-maintenance waterproof floors for busy households, SPC is often the practical choice.
Cost Considerations
Factor material, installation, and prep when planning SPC: typical planks run $2-$5 per sq ft while professional installation adds $1-$3 per sq ft, putting most residential projects at about $3-$8 installed per sq ft. You can lower upfront cost with DIY click-lock installs or pre-attached underlayment, but subsurface repairs, removal, or leveling often add $0.50-$1.50 per sq ft. Opting for thicker wear layers or embossed textures increases price but extends service life, affecting total lifecycle spend.
Initial Investment
For a 1,000 sq ft room expect $2,000-$5,000 for SPC materials (depending on wear layer and finish) versus $5,000-$10,000 for many hardwoods; installation for SPC is faster and can save $1-$3 per sq ft if you DIY the floating floor. Selecting mid-range 12-16 mil wear layers usually balances cost and durability, while premium 20 mil products push the upfront price but reduce replacement frequency in heavy-traffic areas.
Long-term Value
You’ll recover SPC costs through longevity and low maintenance: many residential SPC products carry 10-25 year warranties and, with appropriate wear layers, commonly last 15-25 years. Amortizing a $4 per sq ft investment over 20 years equals roughly $0.20 per sq ft per year. Since SPC eliminates sanding/refinishing and tolerates moisture better than hardwood, your ongoing cleaning and repair expenses tend to be far lower and more predictable.
In high-traffic or commercial settings choose 20 mil wear layers; at home 12-16 mil is often sufficient. You should also weigh waterproof performance-water-related flooring replacements frequently exceed $1,500, so SPC can limit those costs after leaks or floods. Finally, factor disposal and subfloor remediation into lifecycle cost models: avoiding cheap, low-quality products can prevent $1-$3 per sq ft in premature replacement labor and material expenses.
Frequently Asked Questions
Top FAQs
You’ll find answers on durability, installation, and maintenance specific to your project. Manufacturers typically offer 15-30 year residential warranties and list wear layers from 0.3-0.7 mm with plank thicknesses of 4-8 mm to guide selection. For installation, click-lock and glue-down systems both work – click-lock suits floating installs over clean, flat subfloors while glue-down is common in larger commercial areas. If you clean weekly and avoid abrasive pads, your SPC can remain attractive for decades.
To wrap up
Following this, you can see why SPC vinyl flooring is a smart choice: it’s durable, water-resistant, and dimensionally stable, giving long-term performance with low maintenance. Choose quality underlayment, follow manufacturer installation guidelines, control subfloor flatness and moisture, and use proper acclimation and adhesive methods to ensure tight seams. With routine cleaning and prompt care for spills and heavy traffic, your floors will retain appearance and value for years.