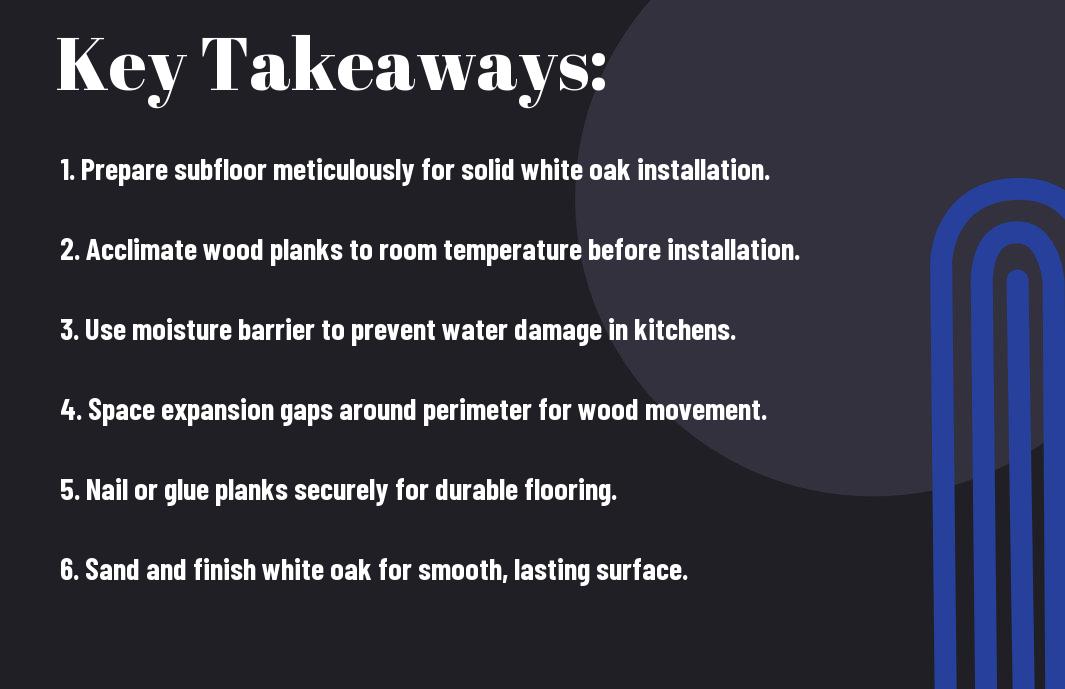
Many homeowners in Kitchener are eager to elevate their living spaces by installing white oak flooring. This stylish and durable choice adds warmth and sophistication to any home. In this guide, you’ll learn effective techniques for installing white oak flooring yourself, empowering you to tackle this rewarding DIY project with confidence. By following these step-by-step instructions, you can achieve a professional finish that enhances your home’s beauty and value while enjoying the satisfaction of doing it yourself.
Choosing the Right White Oak Flooring
Selecting the right white oak flooring involves several considerations that directly impact the look and longevity of your installation. Start by narrowing down your choices based on your lifestyle, aesthetic preferences, and the specific needs of your space. High-quality white oak flooring not only enhances your home’s value but also ensures durability and resistance against wear and tear.
Evaluating Quality and Durability
Sizing and Plank Width Considerations
Choosing the right size and width of your white oak planks influences both the aesthetic and performance of your floor. Standard widths range from 3 to 7 inches, with wider planks creating a modern appearance while narrower planks may evoke a more traditional feel. The length of the planks can also affect the overall look; longer planks provide fewer seams for a more expansive visual effect.
In addition to aesthetics, consider the acoustics and expansion characteristics of the planks as well. Wider planks may expand and contract more than narrower options, so adequate spacing and acclimation time are vital for preserving their integrity. A combination of dimensions that fits your room’s design and minimizes transition strips can lead to an inviting and seamless floor throughout your Kitchener home.
Preparing Your Space for Installation
Your space needs to be perfectly set up for a successful white oak flooring installation. Start by removing all furniture and fixtures from the room. This not only gives you the freedom to move around but also allows you to thoroughly assess the condition of your subfloor. A clean environment streamlines the process and reduces the chance of damaging any furnishings.
Assessing Subfloor Conditions
Check your subfloor for any imperfections that could affect the flooring installation. Look for signs of moisture, uneven surfaces, or damage. A solid subfloor is vital; ideally, it should be flat, clean, and dry. Any issues should be addressed, whether that means repairing damaged areas or ensuring the moisture levels are appropriate to prevent future problems.
Climate Control and Acclimatization
The environment where you will install your flooring plays a significant role in the overall success of the project. Before installation, ensure that the room is kept at a stable temperature between 60°F to 80°F (15°C to 27°C) and maintain humidity levels between 30% and 50%. This encourages the wood to acclimatize properly to its new setting.
During the acclimatization process, you should leave the white oak planks in the room for at least 48 to 72 hours before installation. This allows the wood to adjust to the room’s temperature and humidity, reducing the risk of expansion or contraction post-installation. Stacking the planks in a flat manner, ideally in an open area with some space around them, will facilitate even acclimatization, leading to a more stable floor once installed.
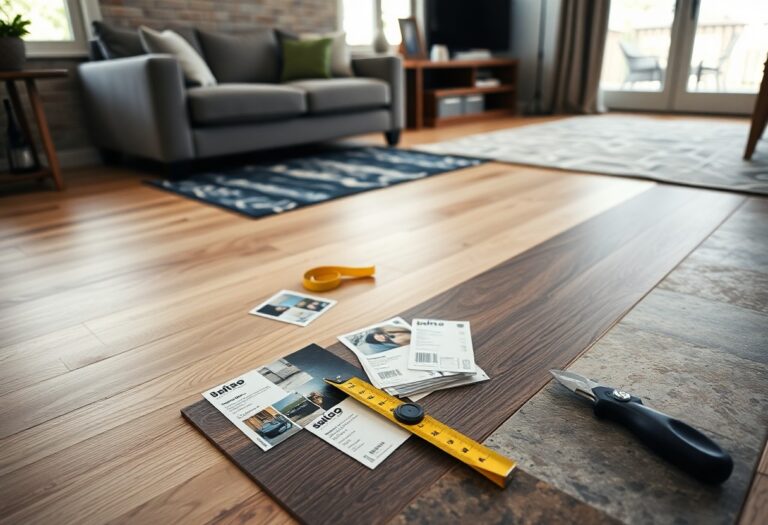
Essential Tools and Materials for DIY Success
Having the right tools and materials can make all the difference in your white oak flooring installation project. From cutting and shaping to securing and finishing your boards, equipping yourself with important items ensures a smoother process and enhances the final outcome. You will not only work more efficiently but also achieve professional-quality results in your Kitchener home.
Must-Have Equipment and Tools
A solid set of tools is foundational to your flooring project. Essential items include a saw for cutting the planks to size—either a miter saw or a table saw will suffice, a flooring nailer or stapler for secure installation, and a mallet for ensuring tight joints. Additionally, you’ll need a tape measure, straight edge, chalk line for marking straight cuts, and a pry bar to assist with the removal of any existing flooring.
Selecting High-Quality Adhesives and Finishes
Choosing the right adhesives and finishes significantly influences the durability and aesthetics of your flooring. Look for adhesives specifically designed for hardwood flooring, which will provide a long-lasting bond while remaining flexible enough to handle seasonal changes. Finishes should enhance the natural beauty of white oak while offering protection from wear, scratches, and moisture damage.
High-quality adhesives often come in urethane or water-based formulas, each with their own benefits. Urethane adhesives form a strong, moisture-resistant bond, making them ideal for environments with fluctuating humidity levels. Water-based finishes, on the other hand, will dry quickly and reduce fumes, ensuring a safer working environment. As you select your materials, consider the long-term implications of your choices; investing in superior adhesives and finishes can save you from future complications and will allow the beauty of your white oak flooring to shine for years to come.
Step-by-Step Installation Process
| Step | Description |
| 1. Acclimate Your Planks | Let the planks adjust to the room’s humidity and temperature for at least 48 hours. |
| 2. Create a Layout Plan | Design your floor layout, ensuring a balanced aesthetic with staggered seams. |
| 3. Starting Row Installation | Begin along the longest wall, using spacers for expansion gaps. |
| 4. Securing Planks | Employ proper fastening techniques to secure your planks effectively. |
| 5. Final Touches | Install trim and moldings for a polished finish. |
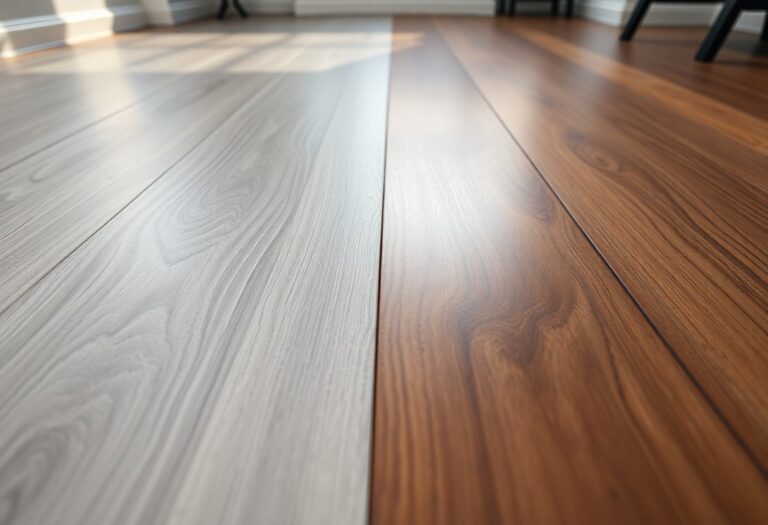
Laying Out the Floor: Design and Aesthetics
Creating an appealing design is key to achieving a professional finish with your white oak floors. Start by planning the layout, considering the direction of the planks. A common practice is to run the planks parallel to the longest wall, maximizing visual flow. Ensure that you stagger the seams between rows, which not only enhances aesthetic appeal but also improves structural integrity.
Securing the Planks: Techniques for Stability
Fastening techniques play a pivotal role in ensuring your white oak flooring remains stable over time. Use either a nail gun or wood glue for effective adhesion, particularly along the tongue-and-groove joints. These methods help prevent movement and reduce the chance of buckling.
For optimal results, consider using a pneumatic nail gun that can drive fasteners at an angle, securing the planks without visible nail heads. Additionally, pre-drilling the holes for anchoring screws can prevent splitting in the wood. This method not only offers a sturdy attachment but also allows adjustments during installation, ensuring everything aligns perfectly. Lastly, always maintain the manufacturer’s recommendations for spacing between fasteners to promote floor expansion without compromising stability.
Common Challenges and Expert Solutions
Every DIY project comes with its fair share of hurdles. With white oak flooring, you might encounter uneven surfaces and temperature fluctuations that can complicate installation. Understanding these challenges and implementing expert solutions can save you time, effort, and frustration during your project.
Dealing with Uneven Surfaces
Uneven surfaces can lead to gaps and an unstable floor. To tackle this, ensure the subfloor is level by using a leveling compound where necessary. Measure the height differences and apply the compound to even out low spots, allowing it to cure thoroughly before you begin laying your planks. A flat subfloor not only enhances the look of your flooring but also increases its lifespan.
Managing Temperature Fluctuations
Temperature can impact wood flooring significantly, causing it to expand and contract. Maintaining a consistent indoor climate will help minimize these effects. Use a dehumidifier or humidifier to regulate humidity levels between 30-50%, especially before and after installation. Ideally, keep your home climate stable, particularly during the installation period, to ensure your flooring remains intact.
Common Issues with Temperature Management
| Issue | Solution |
|————————-|—————————————————|
| High Humidity | Use a dehumidifier to maintain optimal humidity. |
| Low Humidity | Utilize a humidifier to increase moisture levels. |
| Drafts and Temperature Changes | Insulation and sealing windows/doors to stop air leaks.|
Consistent temperature and humidity control are crucial for your white oak flooring’s integrity. Some experts recommend keeping your thermostat set to an optimal level during different seasons to avoid drastic temperature changes. For instance, using a programmable thermostat can help maintain stable conditions throughout the year, reducing the risks of buckling or gaps in your flooring over time.
Additional Temperature Management Tips
| Tip | Explanation |
|——————————|——————————————————-|
| Air Circulation | Ensure there is sufficient airflow around the flooring.|
| Consider Underlayment | Using a moisture barrier can decrease issues related to fluctuating humidity. |
| Regular Monitoring | Using a humidity gauge to keep track of levels indoors.|
Final Touches and Maintenance Tips
After installing your white oak flooring, the final touches can enhance appearance and functionality. Ensure a seamless transition from your new flooring to existing surfaces, consider baseboards, and inspect for any gaps or loose boards. Regular maintenance will also preserve your investment over time.
- Use area rugs to protect high-traffic zones.
- Avoid excessive moisture; clean spills immediately.
- Schedule professional refinishing every 5-10 years.
- Apply a quality hardwood floor cleaner periodically.
This will help maintain the aesthetics and functionality of your flooring for years to come.
Finishing Techniques for Lasting Beauty
Choosing the right finish can greatly influence your white oak flooring’s longevity and appearance. A high-quality polyurethane finish offers robust protection against scratches and wear, while an oil-based finish can enhance wood’s natural grain. Applying multiple coats with proper drying time in between ensures superior durability and an appealing shine.
Routine Care to Extend Lifespan
Regular upkeep is crucial for preserving the look and integrity of your floors. Lightweight sweeping and vacuuming can remove dirt and prevent scratches. Additionally, using furniture pads can protect your flooring from indentation. Maintain a consistent humidity level between 30%-50% to prevent warping, and periodically inspect for any signs of wear.
Implementing a routine care schedule will significantly enhance the lifespan of your white oak flooring. Regular sweeping or vacuuming, performed weekly, prevents debris buildup that can scratch the wood’s surface. Use a damp mop with a pH-neutral cleaner monthly to maintain cleanliness while avoiding harsh chemicals that could damage the finish. This proactive approach not only helps preserve the wood’s beauty but also saves you from costly repairs down the line.
Summing up
From above, you can see that following effective white oak flooring installation techniques enhances your DIY project in Kitchener. By adequately preparing your space, using the right tools, and adhering to proper installation methods, you can achieve a stunning and durable floor that complements your home. Each step, from measuring and acclimating to the final touches, contributes to a successful installation process. Armed with this knowledge, you’re well-prepared to tackle your flooring project with confidence and skill.