You want to ensure a seamless laminate flooring installation in your home, and proper preparation is key. This complete checklist is tailored specifically for Kitchener residents, providing you with necessary steps to take before the installation crew arrives. From clearing your space to managing humidity levels, this guide will equip you with everything you need to create an optimal environment for your new flooring. Let’s look into the details to help you achieve a professional finish.
Assessing Your Current Flooring and Subfloor Conditions
Your current flooring and the underlying subfloor must be thoroughly evaluated to ensure a successful laminate installation. A careful assessment allows you to identify any issues that could hinder the installation process or affect the performance of your new laminate flooring. Addressing these conditions ahead of time can save you time and expenses down the road.
Identifying Existing Flooring Types
Start by determining the type of flooring currently in place, as this can significantly impact your installation process. Different materials require different approaches to remove or prepare them. Here’s a breakdown of common flooring types:
- Carpet: Needs to be fully removed including the underlay.
- Vinyl: Can often be left in place but check for any loose areas.
- Tile: May necessitate a more extensive removal and possibly repair of the subfloor.
- Hardwood: Must be evaluated for flatness and stability.
- Concrete: Should be checked for moisture levels.
Assume that each flooring type has its own preparation steps that will need to be addressed before installing laminate.
| Existing Flooring Type | Preparation Needed |
|---|---|
| Carpet | Remove and dispose of properly |
| Vinyl | Ensure it’s securely bonded to the subfloor |
| Tile | Remove and prepare underlying surface |
| Hardwood | Check for warping or instability |
| Concrete | Moisture testing and leveling if necessary |
Evaluating Subfloor Integrity
A sound subfloor is vital for a successful laminate flooring installation. Inspect for any sagging, squeaking, or water damage, which indicates a need for repair. Uneven surfaces can lead to issues with the laminate interlocking properly, so identifying these problems early allows you to address them effectively.
Cracks or soft spots in the subfloor can compromise the stability of your new floor, leading to shifting and potential wear over time. This is especially important for areas with high moisture, such as kitchens and bathrooms, where water damage may have occurred. Use a level to check for flatness and ensure there’s no significant variation in height. If repairs are needed, consider utilizing plywood or a self-leveling compound to prepare the surface adequately for installing your laminate flooring.
Measuring Your Space Accurately
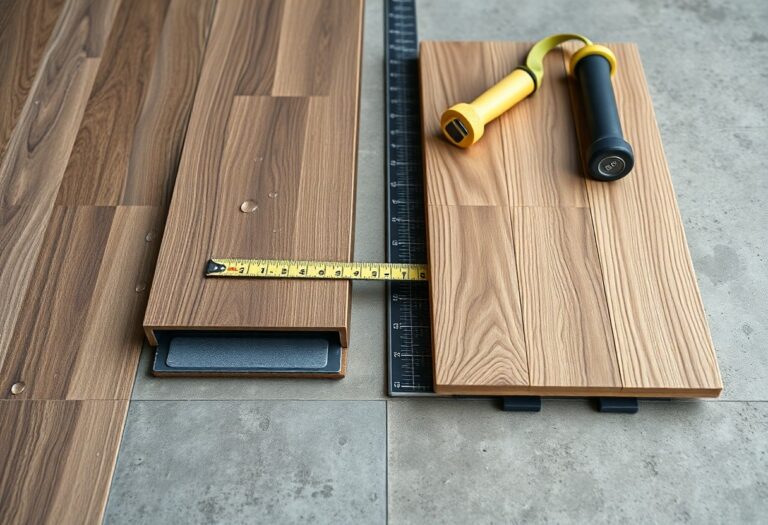
Accurate measurements ensure that you purchase the right amount of laminate flooring while preventing costly mistakes during installation. Start by measuring the length and width of each room, accounting for any obstacles like cabinets or islands. Using these measurements, calculate the total square footage and add an extra 10% for waste and future repairs. This step will give you a clear idea of how much flooring you will need and help you avoid running into shortages or overages.
Tools You Need for Precise Measurements
To ensure precise measurements, equip yourself with a tape measure, a pencil, and a notepad for taking notes. A laser measuring tool can also be beneficial, especially in larger spaces where accuracy is key. Having graph paper or a room design app can aid in visualizing your layout, making it easier to determine the amount of flooring required and how the planks will fit within your space.
Understanding Installation Limitations
Your flooring installation may face limitations based on the room’s layout and specific features within the space. For instance, uneven floors or transitions between different flooring types can pose challenges that require extra attention. It’s critical to identify potential obstacles like door frames, ventilation ducts, or stairways, as they can significantly affect the installation process and overall appearance of your new laminate flooring. In some cases, adjustments or additional materials may be necessary to accommodate these hindrances effectively.
Organizing Your Home for Efficient Installation
Proper organization of your home sets the stage for a smooth laminate flooring installation. By addressing specific areas beforehand, you can significantly enhance the efficiency of the installation process, keeping it on schedule and minimizing disruptions. This checklist helps streamline the workflow, allowing the professionals to focus solely on installing your new flooring.
Furniture and Personal Item Relocation
Start by relocating all furniture and personal items from the installation area. This includes large furniture pieces like couches and tables, as well as smaller items like decorative objects and electronics. Moving everything out of the way not only protects your belongings but also provides the installers with ample space to work, ensuring a more efficient installation process.
Creating a Clear Path for Installation
To facilitate a seamless installation experience, create a clear path from the entrance of your home to the area where the flooring will be laid. This pathway should be free of obstacles, allowing installers to move their tools and materials easily. Ideally, keep this route clear for any needed trips throughout the giornata, reducing the chance of delays. A few simple tasks, such as removing shoes, mats, or pets from the area, can go a long way in maintaining a safe and efficient workspace, ultimately contributing to a smoother installation timeline.
Preparing for Laminate Acclimation
Proper acclimation of your laminate flooring is crucial to prevent warping and ensure a long-lasting installation. This process allows the planks to adjust to the temperature and humidity levels of your home before installation, making for a successful flooring project. Ensure that you take the necessary steps to prepare both your home environment and the laminate itself for this crucial phase.
Understanding Climate Control Needs
Your home’s climate directly impacts the acclimation process. Maintaining a consistent temperature between 60°F and 80°F (15°C to 27°C) along with humidity levels between 30% and 50% is ideal for laminate flooring. In Kitchener, seasonal changes may require adjustments to indoor climate control systems, which is vital for preparing your laminated planks adequately.
Best Practices for Acclimating Laminate Flooring
Acclimating your laminate flooring involves letting the planks sit in your home for 48 to 72 hours prior to installation. Lay the boxes flat in the area where the flooring will be installed, and ensure that they are spaced apart to allow air circulation. Avoid placing them directly against walls or in areas with direct sunlight to prevent uneven temperature exposure.
During acclimation, it’s crucial to open the boxes and turn the planks occasionally to expose all surfaces to the room’s environment. Avoid stacking the boxes, as this can hinder airflow and cause uneven acclimation. Additionally, check moisture levels with a hygrometer to ensure they remain within the recommended range, as excessive moisture can lead to potential issues post-installation. Following these practices guarantees your laminate floor will perform well in your Kitchener home for years to come.
Choosing the Right Underlayment
Underlayment serves as a foundation for your laminate flooring and plays a significant role in ensuring a successful installation. It acts as a barrier against moisture, provides cushioning, and helps absorb sound, creating a more comfortable and quieter environment in your home. Selecting the right underlayment will enhance the performance and longevity of your flooring, making it important for Kitchener residents to consider the specific needs of their space.
The Role of Underlayment in Installation
The underlayment acts as a protective layer between the subfloor and your laminate planks, contributing to both the aesthetics and functionality of the flooring. It aids in leveling minor imperfections in the subfloor, which can significantly impact how your laminate looks and performs. Furthermore, it helps to reduce noise transmission, making your living space more peaceful.
Selecting the Best Underlayment for Noise and Moisture Control
For optimal noise and moisture control, you should select an underlayment that is specifically designed to address these issues. High-density foam, cork, or rubber options are often effective in minimizing sound levels, while vapor barriers can prevent potential moisture damage from rising dampness in your subfloor. Your choice will depend on the specific conditions of your home, such as the type of subfloor and your personal comfort preferences.
When considering your options, think about the acoustic benefits of each material. For example, cork underlayment not only reduces noise but also offers insulation properties, making it ideal for cooler Kitchener winters. High-density foam can provide both moisture protection and a level of sound absorption sufficient for most households. If your home is in a particularly damp area, investing in an underlayment with a built-in moisture barrier can save you from potential problems in the future. Choosing the right underlayment contributes significantly to the longevity and performance of your laminate flooring, ensuring a pleasant living space for years to come.
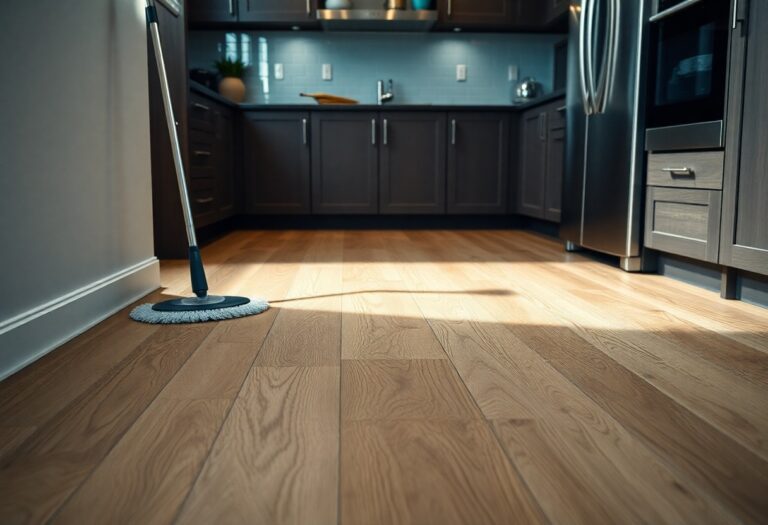
Conclusion
With this in mind, preparing your home for laminate flooring installation is an necessary step that can significantly enhance the outcome of your project. By following the comprehensive checklist outlined, you ensure your space is ready for a smooth installation process while minimizing potential issues down the line. From clearing the area to acclimating your laminate planks, each step is vital for achieving a beautiful and durable finish in your Kitchener home. Proper preparation not only saves you time but also creates a stunning environment that you will enjoy for years to come.