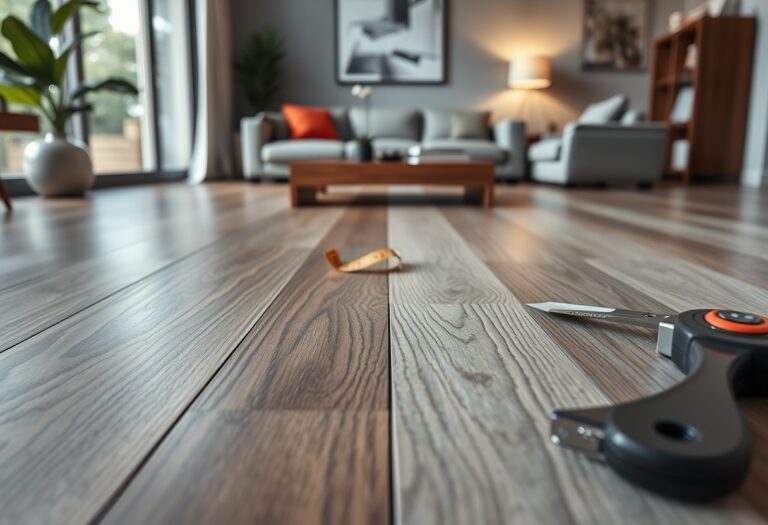

New flooring depends on more than the material you choose: subfloor condition, accurate measurements, and careful fitting all shape the finished result. In Kitchener homes, a professional installer typically inspects the existing floor, prepares the room, and accounts for details such as doorways and baseboards. Your project begins with an assessment of the space and its installation requirements.
Choosing Flooring for Your Kitchener Home
Your flooring choice should suit the way each room is used, fit the look of your home, and account for conditions such as tracked-in snow and spring moisture. A quiet bedroom has different demands from a busy entryway, while an open-plan layout benefits from a finish that connects adjoining spaces. In Kitchener homes, matching flooring decisions to room function, household routines, and seasonal exposure gives you a practical basis for choosing a consistent interior style.
Assessing Room Function and Household Needs
Start with the traffic each room receives and the tasks that happen there. A kitchen floor faces spills, chair movement, and frequent cleaning, while a home office usually sees less foot traffic but benefits from a finish that suits its furnishings. Pets, young children, and mobility needs also affect your priorities, including how easily you can clean the surface and whether its texture feels secure underfoot. Note where doorways, furniture legs, and rolling desk chairs create repeated wear.
Considering Kitchener’s Climate and Seasonal Changes
Kitchener’s winters bring snow, salt, and moisture into entryways, and summer humidity can affect indoor conditions. Your plans should account for exposed areas near exterior doors, basement rooms, and spaces with limited temperature control. A properly placed mat and a clear transition between an entry and adjacent rooms can reduce grit and wet footwear reaching the main living area. For a mudroom, map where boots, coats, and dripping umbrellas are likely to collect.
- Mark exterior doors and the usual path from each entrance.
- Identify rooms with underfloor heating or direct afternoon sun.
- Record doorway thresholds and changes in floor height.
Comparing Flooring Materials
Your flooring choice affects how installers cut, fasten, and finish each surface. Solid wood requires a suitable wood subfloor and careful fastening, while tile depends on a stable, flat base and precise grout lines. Vinyl, laminate, and carpet use different joining or fastening methods, so transitions at doorways and edges vary by material. These installation differences matter in Kitchener homes, where rooms may combine open areas, stairways, and smaller spaces with multiple floor coverings.
| Material | Installation method | Key installation consideration |
|---|---|---|
| Solid hardwood | Fastened to a wood subfloor | Requires a suitable fastening base |
| Engineered wood | Glued, stapled, or installed as a floating floor | Method depends on product and subfloor |
| Laminate | Usually installed as a floating floor | Click joints need accurate alignment |
| Luxury vinyl | Planks or tiles are glued or fitted as a floating floor | Subfloor flatness affects the finished surface |
| Tile | Set in mortar and grouted | Needs a rigid, stable base |
Hardwood, Engineered Wood, and Laminate
Solid hardwood is nailed or stapled to a wood subfloor, creating a durable, refinishable surface, but it is not suited to every slab or below-grade room. Engineered wood has layered construction and offers more installation options, including glue-down and floating methods, depending on the product. Laminate typically clicks together over an underlay without direct fastening. Its wear layer resists everyday scuffs, though damaged boards generally cannot be sanded and refinished like solid wood.
Luxury Vinyl, Tile, and Carpet
Luxury vinyl planks and tiles are available in glue-down and click-lock formats, with a thin profile that makes neat transitions to adjoining floors important. Ceramic and porcelain tile are set in mortar and grouted; their weight and rigid finish require a stable base, while cuts around corners demand precision. Carpet is stretched over tack strips or glued in place, depending on the product and location. Its soft surface conceals minor subfloor irregularities better than tile does.
Preparing for Installation
Before materials are cut or placed, your installer reviews the rooms, confirms measurements, and identifies conditions that could affect the finished floor. Clear communication about doorways, closets, transitions, and areas with restricted access gives the crew an accurate scope of work. You should also confirm which rooms are included and how existing flooring will be handled, so the written plan reflects the actual layout of your Kitchener home.
Subfloor Inspection and Moisture Testing
During the assessment, your installer checks the subfloor for movement, uneven areas, damage, and residue that could interfere with adhesion or create noise. A straightedge reveals high and low spots, while a moisture meter measures readings in wood or concrete; concrete may also require a designated moisture test. The flooring manufacturer’s limits guide any needed repairs or moisture control. Recordings from the affected rooms give you a clear basis for addressing concerns before new flooring is approved.
Furniture Removal, Acclimation, and Scheduling
Before the scheduled work, arrange furniture removal, protect items that remain, and confirm access to the rooms and parking for the crew. Your installer will explain whether the selected product needs to acclimate indoors and specify the storage conditions, since hardwood and some other materials respond to temperature and humidity. Keep delivery cartons in the designated space, away from exterior walls and direct sunlight, and maintain the room conditions set out in the product instructions.
- Remove fragile décor from nearby shelves.
- Secure pets away from the work area.
- Set aside paint or trim details for reference.
What Happens During Professional Installation
Your installation crew typically begins by confirming the work area, checking the subfloor, and organizing materials and tools. They address conditions that could affect the finished floor, such as uneven spots or debris, before laying new boards, tile, or carpet. Once the base is ready, installers work across the room in a planned sequence, keeping joints aligned and edges controlled. The exact fitting technique depends on the flooring material and the room’s layout.
Material Layout, Cutting, and Fitting
Installers establish a starting line and dry-fit pieces where the layout or pattern needs verification. For hardwood and laminate, they stagger end joints and use a tapping block to close seams; tile setters use spacers to maintain consistent grout lines. Cuts around doorjambs, pipes, and cabinets are measured and made with the appropriate saw or tile cutter. At walls, installers leave the expansion clearance required by the flooring manufacturer.
Transitions, Trim, and Final Inspection
Once the field flooring is in place, installers fit transition strips where materials meet or the floor changes height. They reinstall or replace baseboards and shoe moulding, fastening trim to the wall rather than through a floating floor. During the final inspection, you can walk the room with the installer to identify visible gaps, loose edges, uneven transitions, or missed adhesive. The crew also removes cutting debris and checks door clearance.
- Keep pets and household traffic out of the active work area.
- Leave exterior doors accessible for material handling.
- Set aside matching spare planks or tiles after installation.
Costs, Quotes, and Project Timelines
Installation budgets and schedules depend on the room’s size and shape, the selected flooring, and the condition of the existing subfloor. A straightforward bedroom with level plywood typically involves fewer labour hours than a kitchen with irregular edges, transitions, and cabinets to work around. In Kitchener, ask how the installer accounts for material delivery, site access, and any work that could affect the start date, then confirm the expected duration in writing.
Labour, Materials, and Additional Preparation
Material costs reflect the flooring type, grade, plank or tile format, and the quantity needed to cover the room plus cutting waste. Labour varies with the installation method, such as click-lock floating floors versus glued or nailed products, and with detailed cuts around door jambs and stairs. Subfloor repairs, moisture testing, removal of old flooring, and disposal add separate charges. A quote for hardwood over uneven concrete, for instance, should identify the levelling work and any approved underlayment.
Reviewing Estimates, Warranties, and Completion Dates
Before accepting an estimate, confirm that it lists product specifications, measured area, labour, preparation, trim, disposal, taxes, and payment milestones. Ask whether the stated completion date includes acclimation time for materials, delivery, and drying time for adhesives or levelling compounds. Written warranty terms should distinguish product coverage from installation workmanship and state any exclusions. If a change in subfloor condition alters the scope, request an itemized change order with the revised cost and schedule before work proceeds.
| Estimate item | What it covers | Schedule or cost detail |
|---|---|---|
| Flooring materials | Product, quantity, and cutting allowance | Confirm delivery timing |
| Installation labour | Layout, fitting, and installation method | Depends on room complexity |
| Subfloor preparation | Testing, repairs, or levelling | Scope may change after removal |
| Completion terms | Milestones, warranty, and exclusions | Include curing or acclimation time |
Caring for Newly Installed Floors
Regular care keeps your floor’s finish intact and limits the buildup of grit that can wear the surface. Use a soft-bristle broom or a vacuum with a floor setting, and wipe spills promptly with a clean cloth. Follow the flooring maker’s care instructions, since unsuitable cleaners can dull finishes or affect seams. Keep a simple routine suited to household traffic, such as sweeping entryways more often during wet Kitchener winters.
Cleaning by Flooring Type
For hardwood, use a dry microfiber mop and a cleaner approved for the floor’s finish; avoid soaking the boards. Laminate also needs minimal moisture, so spray cleaner onto the mop rather than directly onto the surface. Luxury vinyl tolerates damp mopping with a pH-neutral cleaner, while tile can be cleaned with a compatible solution and a soft brush for grout. A vacuum’s beater bar should stay off delicate surfaces.
Preventing Scratches, Moisture Damage, and Wear
Place felt pads beneath chair and table legs, and lift furniture rather than dragging it across the floor. Use washable mats at exterior doors to catch road grit and slush, but choose mats with backing approved for your flooring. Wipe wet footwear and pet spills promptly, especially near seams and wood edges. In sunny rooms, close blinds during strong afternoon exposure to reduce uneven fading across exposed boards or planks.
| Risk | Routine protection | Useful detail |
|---|---|---|
| Grit and surface wear | Sweep entryways and use door mats | Remove salt and sand promptly |
| Furniture scratches | Fit felt pads and lift items | Replace worn pads as needed |
| Moisture damage | Blot spills and damp footwear | Pay attention to seams and edges |
To wrap up
Professional flooring installation in Kitchener gives you a defined sequence: a site assessment, subfloor preparation, accurate fitting, and a final inspection. Your installer should explain how the selected material affects acclimation, room access, and project timing, then identify any issues such as uneven concrete or damaged underlayment before work begins. After installation, follow the product-specific cleaning and curing instructions, especially for hardwood finishes and tile grout, to protect your new floor from the first day.